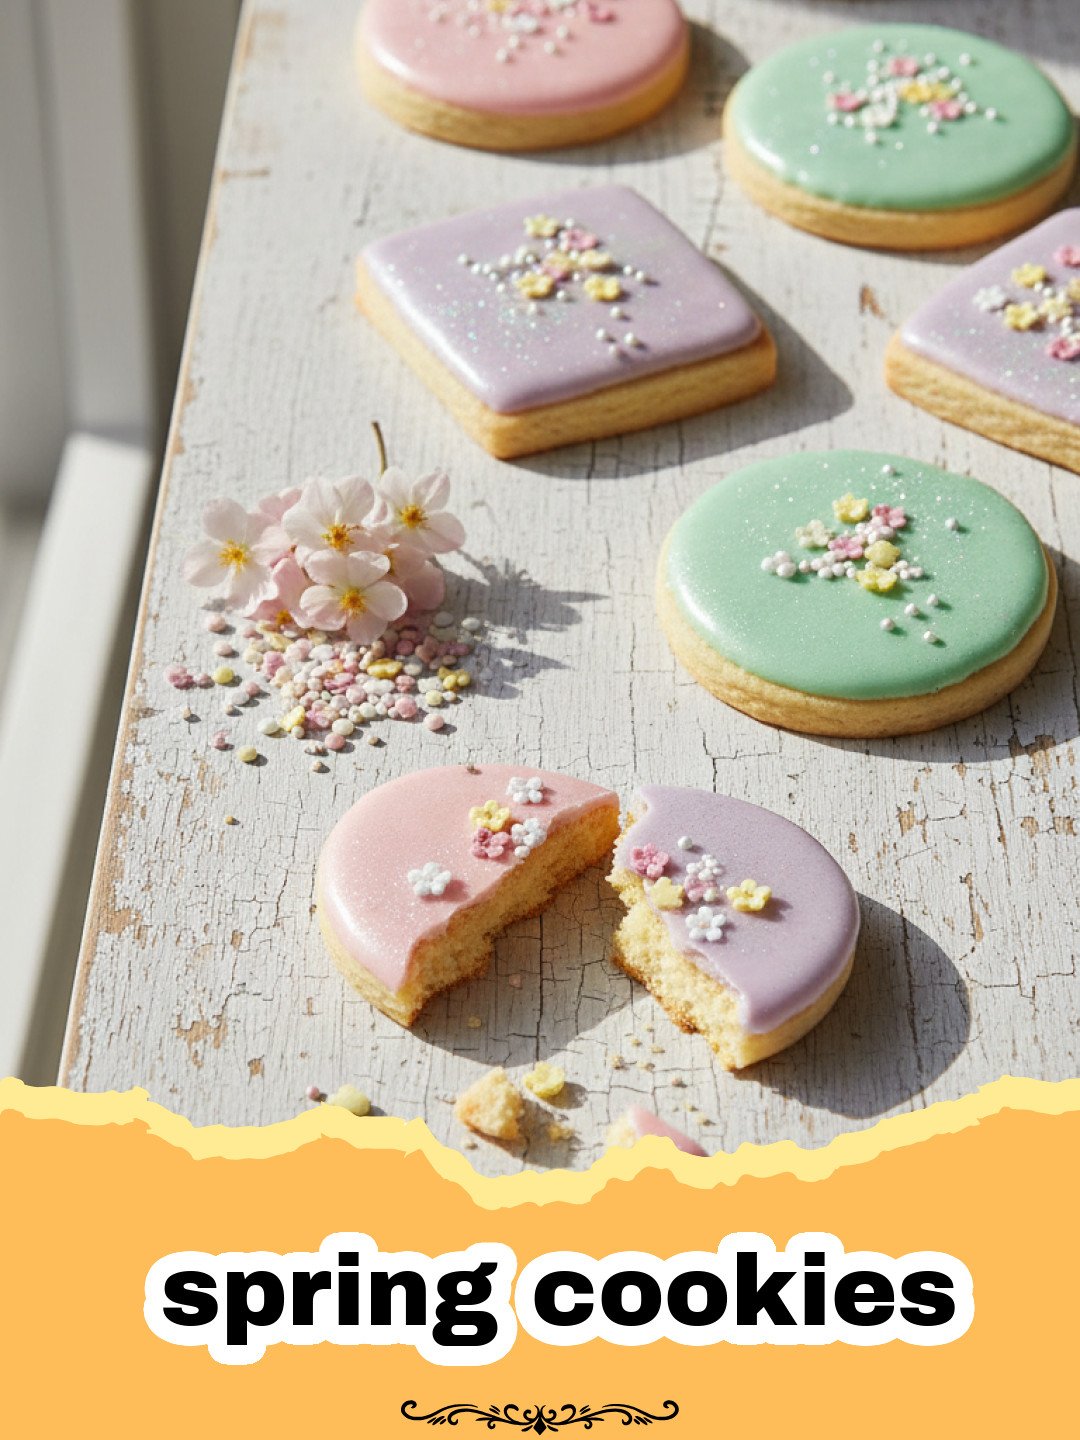
Ah, spring! There’s something truly magical about the world waking up after a long winter. For me, the first daffodil pushing through the soil isn’t just a sign of warmer weather; it’s a cue to dust off my baking aprons and fill the kitchen with the sweet aroma of renewal. I remember one particular spring morning, many years ago, when my grandmother, with her flour-dusted hands and a twinkle in her eye, taught me her secret to making the most tender, flavorful spring cookies. The sun streamed through her kitchen window, highlighting the specks of flour floating in the air, and the simple act of pressing a flower-shaped cookie cutter into soft dough felt like bottling pure joy. Those moments, filled with laughter, storytelling, and the irresistible scent of vanilla and lemon, are etched into my memory. These spring cookies are more than just a dessert; they are a celebration of life, growth, and the sweet promise of a new season, perfect for bringing warmth and cheer to your home.
Why These Spring Cookies Are a Must-Try
- Pure Joy in Every Bite: These spring cookies are incredibly soft, chewy, and bursting with bright, delicate flavors that perfectly capture the essence of the season.
- Endlessly Customizable: From simple glazes to elaborate royal icing designs, these spring cookies are a perfect canvas for your creativity, making them ideal for any springtime occasion.
- Perfect for Gifting: Beautifully decorated spring cookies make heartwarming gifts for Easter, Mother’s Day, or just to spread a little joy to friends and neighbors.
- Family-Friendly Fun: The process of making and decorating these spring cookies is a wonderful activity for all ages, creating lasting memories in the kitchen.
Key Ingredient Notes for Perfect Spring Cookies
Achieving the perfect texture and flavor for these delightful spring cookies relies on a few key ingredients. Here’s what you need to know:
Unsalted Butter: The Foundation of Flavor
Using unsalted butter is crucial because it gives you control over the salt content in your spring cookies. Make sure it’s at room temperature – not melted, not too cold. Softened butter creams beautifully with sugar, creating a light, airy base that contributes to the cookies’ tender crumb. If your butter is too cold, it won’t cream properly, leading to dense cookies. Too warm, and it can make the dough greasy and difficult to work with. Aim for butter that yields slightly when pressed.
All-Purpose Flour: The Structure Builder
While it might seem basic, the right amount of all-purpose flour is essential for these spring cookies. I always recommend measuring flour by weight (grams) for accuracy, but if using cups, spoon and level it to avoid packing too much in. Too much flour will result in dry, crumbly spring cookies that lack tenderness, while too little can make them spread excessively and lose their shape. A well-measured flour ensures your spring cookies have the perfect structure without being tough.
Lemon Zest & Extract: Brightness of Spring
These two ingredients truly elevate the ‘spring’ in our spring cookies. Fresh lemon zest provides a vibrant, aromatic burst that’s far superior to extract alone. It contains natural oils that infuse the dough with a beautiful, subtle citrus flavor without making the cookies sour. The lemon extract complements this, offering a more concentrated citrus note. Together, they create a wonderfully refreshing flavor profile that sings of sunny days and blooming flowers, making these truly unique spring cookies.

Step-by-Step Guide with Pro Tips for Irresistible Spring Cookies
Follow these steps closely to ensure your spring cookies turn out perfectly every time! Get ready to bake some beautiful spring cookies.
- Step 1: In a large mixing bowl, cream together the softened unsalted butter and granulated sugar using an electric mixer on medium speed until the mixture is light and fluffy, about 3-5 minutes. Scrape down the sides of the bowl as needed to ensure everything is well combined for your beautiful spring cookies.
- Step 2: Beat in the large egg, vanilla extract, and lemon extract until just incorporated. Don’t overmix. Add the lemon zest and mix briefly.
- Step 3: In a separate medium bowl, whisk together the all-purpose flour, baking powder, and salt.
- Step 4: Gradually add the dry ingredients to the wet ingredients, mixing on low speed until just combined. Be careful not to overmix the dough, as this can lead to tough spring cookies. The dough will be soft but shouldn’t be overly sticky.
- Step 5: Divide the dough in half, flatten each half into a disk, wrap tightly in plastic wrap, and refrigerate for at least 30 minutes, or up to 2 hours. This chilling step is crucial for preventing your spring cookies from spreading too much and helps them hold their shape.
- Step 6: Preheat your oven to 375°F (190°C). Line baking sheets with parchment paper or silicone baking mats.
- Step 7: On a lightly floured surface, roll out one disk of chilled dough to about ¼-inch thickness. Use your favorite spring-themed cookie cutters (flowers, butterflies, eggs, etc.) to cut out shapes. Gently transfer the cut-out spring cookies to the prepared baking sheets, spacing them about 1 inch apart.
- Step 8: Bake for 8-10 minutes, or until the edges are lightly golden and the centers are just set. The exact baking time will depend on the thickness and size of your spring cookies. For chewy spring cookies, be careful not to overbake them.
- Step 9: Let the spring cookies cool on the baking sheets for 5 minutes before transferring them to a wire rack to cool completely.
- Step 10: Once completely cool, decorate your spring cookies with royal icing, simple glaze, or sprinkles. For another delicious cookie idea, check out our recipe for The Ultimate Chewy Oatmeal Cookies.
Variations & Serving Suggestions for Your Spring Cookies
These versatile spring cookies can be adapted in countless ways to suit your taste and occasion. Here are some ideas to inspire your next batch of spring cookies:
Flavor Variations:
- Orange Blossom: Replace lemon zest and extract with orange zest and orange extract for a sweeter, warmer citrus note.
- Almond Bliss: Add ½ teaspoon of almond extract along with or in place of vanilla for a distinct nutty flavor.
- Lavender Infusion: Gently infuse the butter with a teaspoon of culinary lavender buds during the creaming stage, then strain before adding other ingredients for subtle floral spring cookies.
- Coconut Dreams: Mix in ½ cup of finely shredded coconut into the dough for a tropical twist.
Decoration Ideas:
- Simple Glaze: A quick glaze made from powdered sugar, milk, and a splash of lemon juice is perfect for a rustic look. Drizzle over cooled spring cookies.
- Royal Icing Masterpiece: For intricate designs, use royal icing tinted with pastel food colorings. Think delicate flowers, polka dots, or geometric patterns. These are truly artful spring cookies.
- Natural Dyes: Use natural food colorings like beet juice (pink), turmeric (yellow), or spirulina (green) for naturally vibrant spring cookies.
- Edible Flowers: Press small, edible flowers (like violas or pansies) onto the cookies immediately after baking or onto wet icing for a stunning, garden-fresh look.
Serving Suggestions:
- Afternoon Tea: Serve these elegant spring cookies alongside a cup of herbal tea or a refreshing iced lemonade.
- Spring Picnics: Pack a batch of these cheerful spring cookies for your next outdoor adventure. They travel well and are always a hit.
- Dessert Platter: Arrange a variety of decorated spring cookies on a platter with fresh berries and perhaps a slice of The Easiest Cheesecake Ever! for a show-stopping spring dessert spread.
- Gift Baskets: Package decorated spring cookies in clear bags with a pretty ribbon for hostess gifts or party favors.
Nutrition Information
Here’s an estimated nutritional breakdown per serving of these delightful spring cookies:
| Nutrient | Amount per serving |
|---|---|
| Calories | 150 kcal |
| Carbohydrate Content | 22g |
| Cholesterol Content | 25mg |
| Fat Content | 7g |
| Fiber Content | 0.5g |
| Protein Content | 1.5g |
| Saturated Fat Content | 4g |
| Serving Size | 1 cookie (approx. 25g) |
| Sodium Content | 60mg |
| Sugar Content | 12g |
| Trans Fat Content | 0.1g |
| Unsaturated Fat Content | 2.5g |
Conclusion
These delightful spring cookies are truly a celebration in every bite. They bring a touch of sunshine and joy to any occasion, and the act of making them is a wonderful way to connect with the season and create beautiful memories. Whether you’re a seasoned baker or just starting out, this recipe for spring cookies is approachable, rewarding, and utterly delicious. So gather your ingredients, put on your favorite spring playlist, and let the aroma of freshly baked spring cookies fill your home. Happy baking!
FAQs
What makes these spring cookies taste like spring?
The secret to the fresh, vibrant spring flavor in these cookies comes from a combination of fresh lemon zest and a hint of lemon extract. This bright citrus profile perfectly complements the sweetness and buttery texture, evoking the lightness and renewal of the spring season.
Can I make the dough for these spring cookies ahead of time?
Absolutely! The dough for these spring cookies can be made up to 2-3 days in advance. Simply wrap it tightly in plastic wrap and store it in the refrigerator. When you’re ready to bake, let it sit at room temperature for about 10-15 minutes to soften slightly before rolling.
What are the best ways to decorate spring cookies?
These spring cookies are a fantastic canvas for decoration! You can use a simple glaze made from powdered sugar and milk for a rustic look, or opt for royal icing for more intricate designs like flowers, butterflies, or pastel patterns. Sprinkles, edible glitter, or even small edible flowers can add a beautiful finishing touch to your spring cookies.
How do I prevent my spring cookies from spreading too much?
The key to preventing your spring cookies from spreading is to chill the dough thoroughly. After mixing, make sure to refrigerate the dough for at least 30 minutes, or up to 2 hours. This solidifies the butter, which helps the cookies hold their shape during baking. Also, ensure your butter is at room temperature (not melted) when you start, and avoid overmixing the dough.

Delightful Spring Blossom Sugar Cookies
Celebrate the season with these soft, chewy, and irresistibly buttery spring cookies, subtly flavored with lemon. Perfect for decorating and sharing, they bring the joy of spring to your kitchen.
- Total Time: 1 hour 20 minutes
- Yield: 36 cookies 1x
Ingredients
1 cup (226g) unsalted butter, softened
1 ½ cups (300g) granulated sugar
1 large egg, room temperature
1 teaspoon vanilla extract
½ teaspoon lemon extract
1 tablespoon fresh lemon zest
3 cups (360g) all-purpose flour
1 teaspoon baking powder
½ teaspoon salt
For decorating: Royal icing, food coloring, sprinkles (optional)
Instructions
Step 1: In a large mixing bowl, cream together the softened unsalted butter and granulated sugar using an electric mixer on medium speed until the mixture is light and fluffy, about 3-5 minutes. Scrape down the sides of the bowl as needed.
Step 2: Beat in the large egg, vanilla extract, and lemon extract until just incorporated. Don’t overmix. Add the lemon zest and mix briefly.
Step 3: In a separate medium bowl, whisk together the all-purpose flour, baking powder, and salt.
Step 4: Gradually add the dry ingredients to the wet ingredients, mixing on low speed until just combined. Be careful not to overmix the dough. The dough will be soft but shouldn’t be overly sticky.
Step 5: Divide the dough in half, flatten each half into a disk, wrap tightly in plastic wrap, and refrigerate for at least 30 minutes, or up to 2 hours. This chilling step is crucial for preventing your cookies from spreading too much.
Step 6: Preheat your oven to 375°F (190°C). Line baking sheets with parchment paper or silicone baking mats.
Step 7: On a lightly floured surface, roll out one disk of chilled dough to about ¼-inch thickness. Use your favorite spring-themed cookie cutters to cut out shapes. Gently transfer the cut-out cookies to the prepared baking sheets, spacing them about 1 inch apart.
Step 8: Bake for 8-10 minutes, or until the edges are lightly golden and the centers are just set. The exact baking time will depend on the thickness and size of your cookies. For chewy cookies, be careful not to overbake.
Step 9: Let the cookies cool on the baking sheets for 5 minutes before transferring them to a wire rack to cool completely.
Step 10: Once completely cool, decorate your cookies with royal icing, simple glaze, or sprinkles as desired. Enjoy your beautiful spring cookies!
Notes
For best results, ensure butter is truly room temperature. Do not overmix the dough. Chilling is essential for maintaining cookie shape. Store decorated cookies in an airtight container at room temperature for up to 5 days, or freeze undecorated baked cookies for up to 3 months.
- Prep Time: 30 minutes
- Cook Time: 10 minutes
- Category: Dessert
- Cuisine: American
Nutrition
- Serving Size: 1 cookie (approx. 25g)
- Calories: 150 kcal
- Sugar: 12g
- Sodium: 60mg
- Fat: 7g
- Saturated Fat: 4g
- Unsaturated Fat: 2.5g
- Trans Fat: 0.1g
- Carbohydrates: 22g
- Fiber: 0.5g
- Protein: 1.5g
- Cholesterol: 25mg
Keywords: spring cookies, sugar cookies, lemon cookies, decorated cookies, spring dessert, Easter cookies, Mother’s Day cookies, cookie recipe, flower cookies, seasonal baking