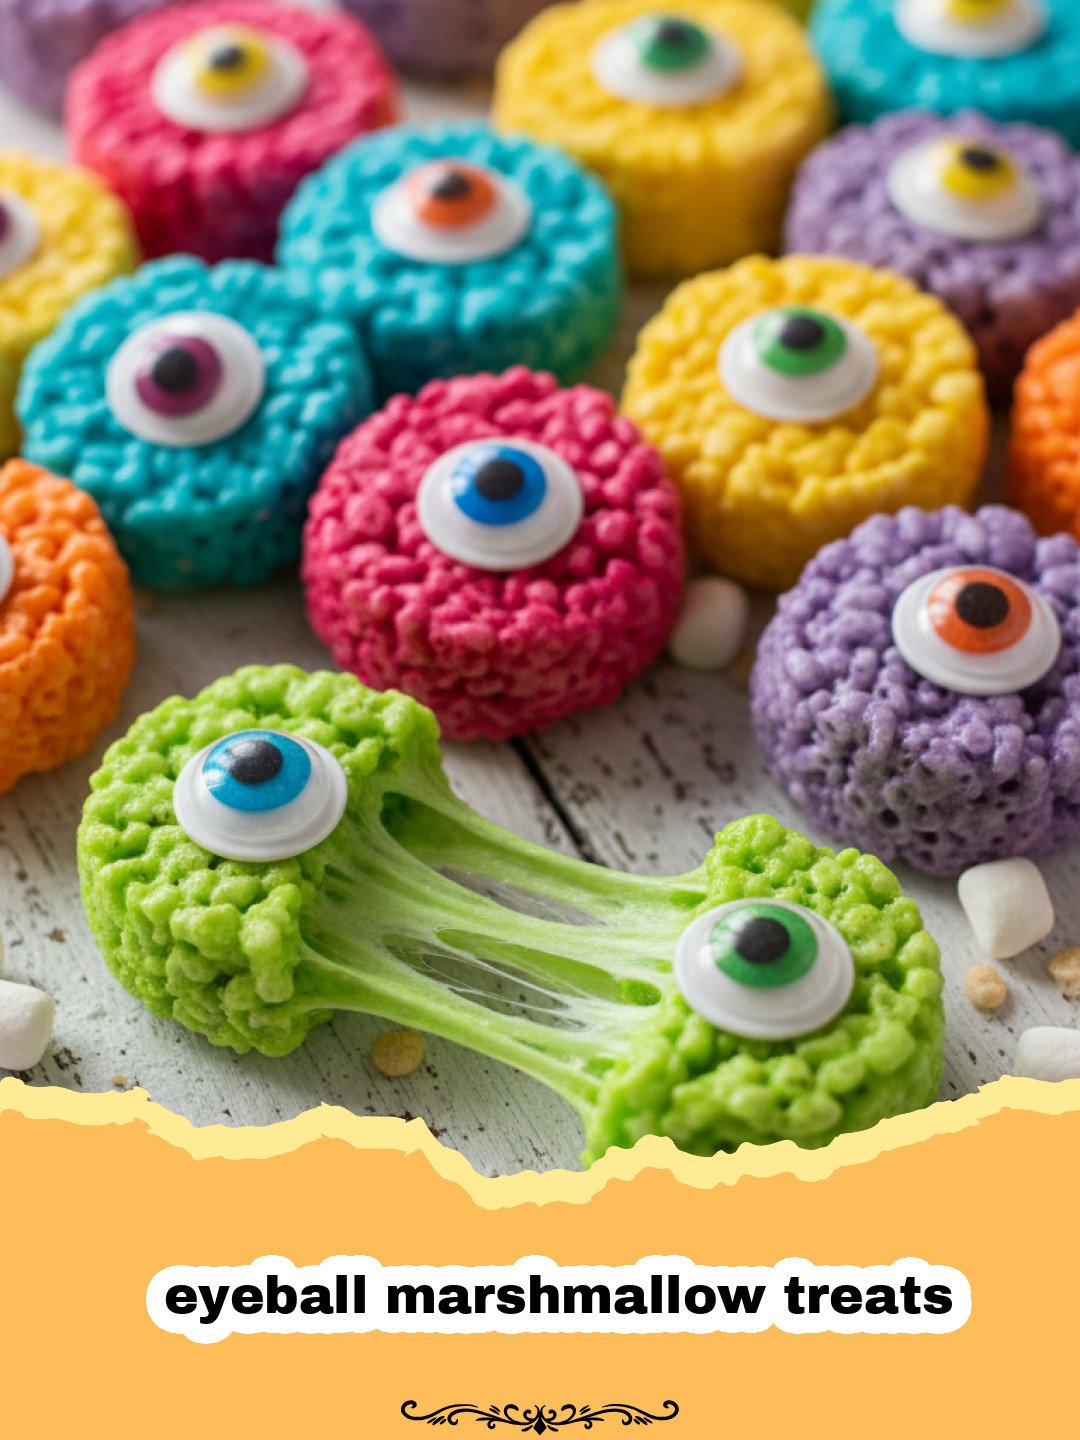
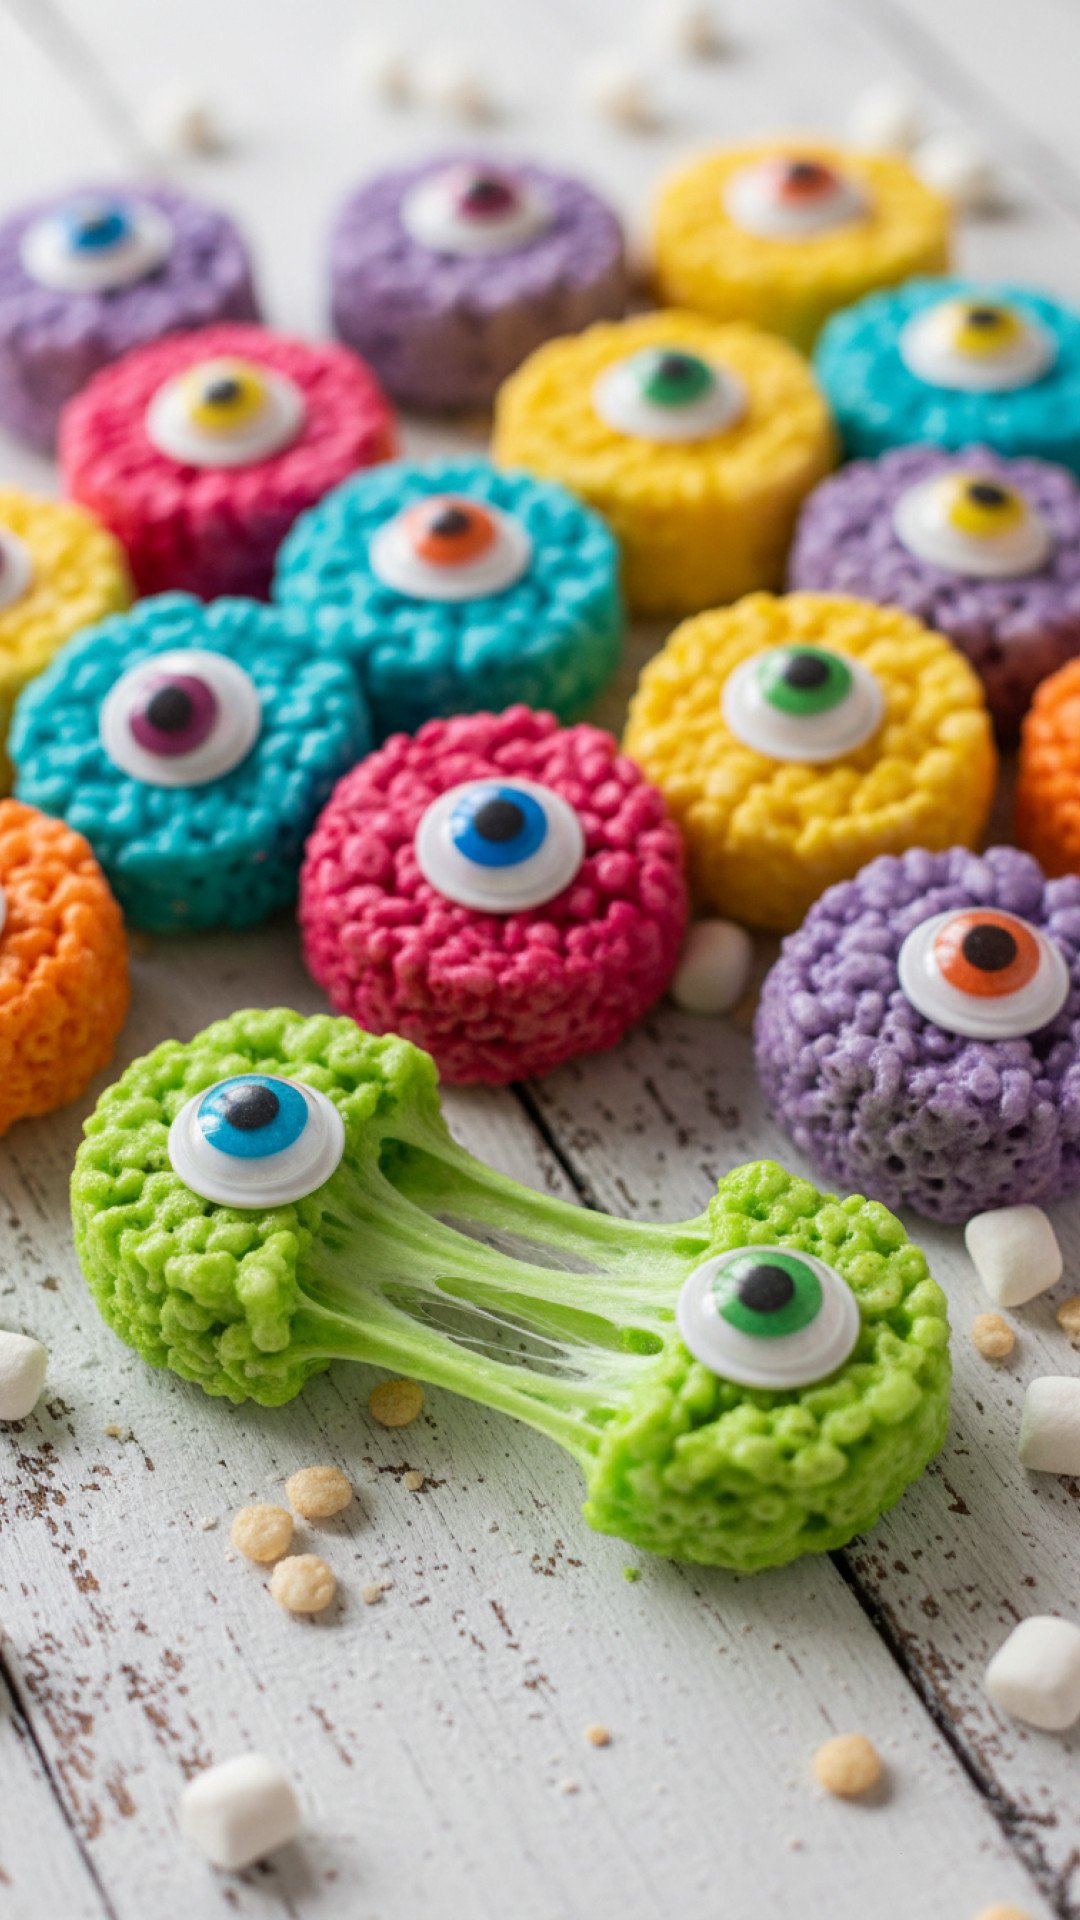
Making eyeball marshmallow treats always brings back the most nostalgic memories of my childhood kitchen during the crisp month of October. I remember standing on a sturdy wooden stool, my hands covered in a sticky, sweet mixture of melted butter and marshmallows, as my mother helped me press the cereal into a pan. The kitchen smelled like toasted vanilla and warm sugar. Every year, we would try to outdo ourselves with the ‘spookiness’ of our snacks, and these eyeball marshmallow treats were the crowning achievement of our Halloween party spread. They are more than just a snack; they are a tradition that bridges the gap between creepy and cute, making them the perfect centerpiece for any autumn gathering. Whether you are hosting a large classroom party or just looking for a fun weekend activity with your little ones, these gooey delights are sure to create lasting memories and plenty of smiles.
Why This Recipe is a Must-Try
- Incredible Simplicity: These eyeball marshmallow treats require only a handful of ingredients and zero baking time, making them ideal for busy schedules.
- Customizable Fun: You can easily swap the colors, use different sized candy eyes, or even add chocolate drizzles to make each treat unique.
- Perfect for Groups: This recipe yields a large batch, making it a cost-effective and popular option for school events or potlucks.
- Engaging for Kids: Children love the tactile experience of shaping the treats and the creative freedom of placing the ‘eyes’ on their spooky creations.
Key Ingredient Notes
The success of your eyeball marshmallow treats depends heavily on the quality and freshness of your ingredients. First and foremost, always use fresh marshmallows. If your marshmallows are even slightly stale, they won’t melt into that smooth, elastic consistency required for the perfect chew. Mini marshmallows tend to melt faster and more evenly than the large ones. Secondly, the puffed rice cereal provides the essential crunch. Make sure the cereal is fresh out of the box to maintain that satisfying snap. If you want to add a layer of flavor, consider adding a teaspoon of high-quality vanilla extract or a pinch of salt to the melted marshmallow mixture. These small additions elevate the eyeball marshmallow treats from a simple snack to a gourmet-style treat. For the decoration, look for candy eyes in the baking aisle. You can find them in various sizes; using a mix of small and large eyes can give your eyeball marshmallow treats a fun, eccentric look that kids absolutely adore.
Step-by-Step Guide with Pro Tips
Creating the perfect eyeball marshmallow treats is a science of temperature and timing. You want to melt your butter over low heat to prevent it from browning or burning, which could alter the flavor of your treats. Once the butter is melted, add your marshmallows and stir constantly. Patience is key here; rushing the melting process with high heat will lead to hard, brittle treats rather than the soft, gooey texture we crave. After the mixture is smooth, quickly fold in your rice cereal. Work efficiently because the marshmallow sets fast! When it comes to shaping your eyeball marshmallow treats, here is a pro tip: lightly grease your hands with butter or a bit of cooking spray. This prevents the mixture from sticking to your skin, allowing you to roll smooth, round ‘eyeballs’ with ease. If you find the mixture is too hot, let it sit for just a minute before handling. Once shaped, immediately press your candy eyes into the surface while the marshmallow is still tacky. If you are also serving spooky eyeball brownies, you can use the same decorating techniques to maintain a consistent theme across your dessert table. For those who want an extra ‘bloody’ effect, you could even pair these with bloody eyeball candy apples for the ultimate spooky buffet.
Variations & Serving Suggestions
While the classic version of eyeball marshmallow treats is a winner, don’t be afraid to get creative. You can add a few drops of green or neon purple food coloring to the melted marshmallow mixture to give the eyeballs a monstrous tint. Another popular variation is to dip the bottom of each treat in melted white chocolate or dark chocolate for an extra layer of decadence. If you are serving these at a party, consider arranging them on a dark platter to make the white ‘eyeballs’ pop visually. These eyeball marshmallow treats also look fantastic when placed inside individual cupcake liners. For storage, if you have leftovers (which is rare!), I highly recommend using the Basics Glass Food Storage containers to keep them airtight and fresh for several days. These containers are great for maintaining that crisp cereal texture. You can also mix in small pieces of dried fruit or chocolate chips for a surprise texture inside the eyeball marshmallow treats.
Nutrition Information
Understanding the nutritional profile of your snacks is always helpful, especially when serving them to children. Below is a breakdown of the estimated nutritional values for a single serving of these delicious eyeball marshmallow treats.
| Nutrient | Amount per Serving |
|---|---|
| Calories | 120 kcal |
| Carbohydrate Content | 24g |
| Cholesterol Content | 5mg |
| Fat Content | 3g |
| Fiber Content | 0.5g |
| Protein Content | 1g |
| Saturated Fat Content | 1.5g |
| Serving Size | 1 treat |
| Sodium Content | 95mg |
| Sugar Content | 14g |
| Trans Fat Content | 0g |
| Unsaturated Fat Content | 1g |
Conclusion
In conclusion, these eyeball marshmallow treats are the ultimate Halloween snack that combines ease of preparation with maximum festive impact. They capture the spirit of the season in every sticky, crunchy bite. I hope this recipe finds a special place in your home just as it has in mine. Whether you are a seasoned baker or a kitchen novice, these eyeball marshmallow treats are a foolproof way to bring a bit of spooky magic to your table. Don’t forget to share your creations with friends and family, and most importantly, have fun with the process! Happy Halloween and happy snacking!
FAQs
How do I keep the eyeball marshmallow treats from getting too hard?
The key is to melt the marshmallows over very low heat and remove them from the burner the moment they are smooth. Overheating marshmallows causes the sugar to crystallize, resulting in a hard, crunchy texture once cooled.
Can I make these eyeball marshmallow treats in advance?
Yes, you can make them up to 2 days in advance. Be sure to store them in an airtight container at room temperature to keep them soft and fresh.
Are eyeball marshmallow treats gluten-free?
They can be! While marshmallows and butter are generally gluten-free, some puffed rice cereals may contain malt flavoring derived from barley. Always check the label of your cereal to ensure it is certified gluten-free.
What is the best way to attach the candy eyes?
The candy eyes should be pressed onto the eyeball marshmallow treats immediately after shaping while the marshmallow is still warm and sticky. If they have already cooled, you can use a tiny dot of melted chocolate or icing as glue.
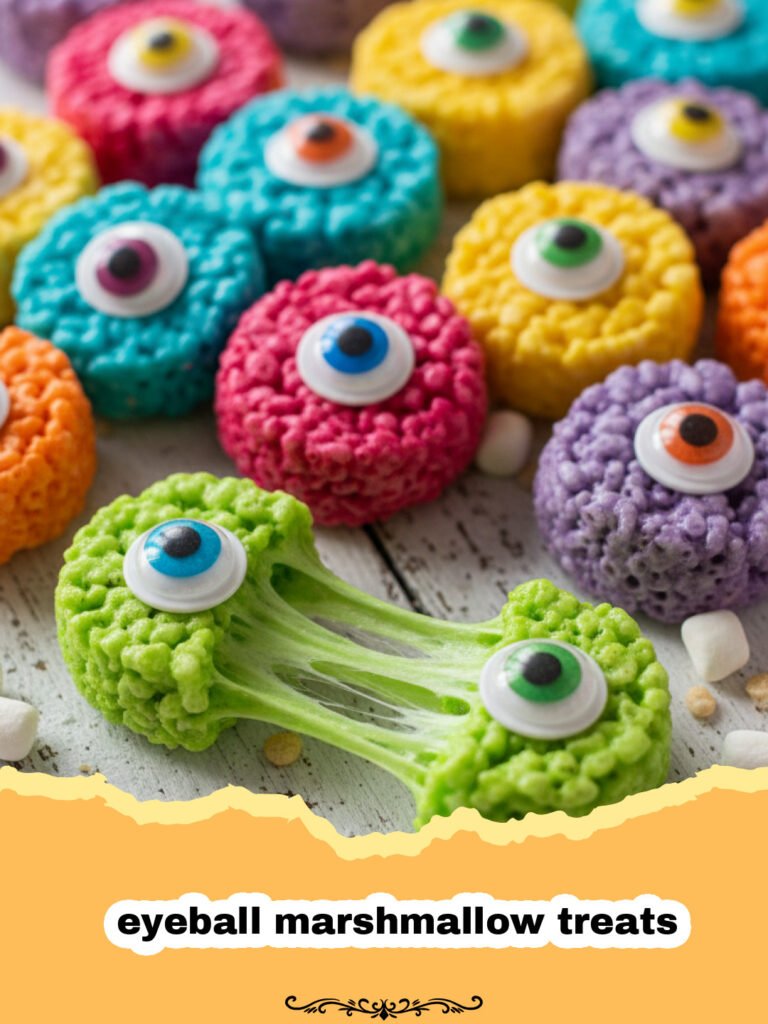
Eyeball Marshmallow Treats
Spooky and delicious eyeball marshmallow treats made with puffed rice cereal, gooey marshmallows, and candy eyes. A perfect Halloween party snack!
- Total Time: 25 minutes
- Yield: 24 treats 1x
Ingredients
6 cups puffed rice cereal
10 oz package of mini marshmallows
3 tablespoons unsalted butter
1 teaspoon vanilla extract
1/4 teaspoon salt
48 candy eyes (assorted sizes)
Optional: Green or purple food coloring
Instructions
Step 1: In a large pot, melt the unsalted butter over low heat. Be careful not to let the butter brown.
Step 2: Add the mini marshmallows to the pot and stir constantly until they are completely melted and smooth.
Step 3: Remove from heat and stir in the vanilla extract, salt, and food coloring if using. Mix well to distribute the color evenly.
Step 4: Gently fold in the puffed rice cereal until it is thoroughly coated with the marshmallow mixture.
Step 5: Using buttered hands or a greased scoop, shape the mixture into 1.5-inch balls (eyeballs).
Step 6: Immediately press two candy eyes into each ball while the mixture is still sticky and warm.
Step 7: Place the eyeball marshmallow treats on a sheet of parchment paper and allow them to cool completely and set before serving.
Notes
Keep your hands greased with butter to prevent sticking while shaping the treats. Store in an airtight container for up to 3 days.
- Prep Time: 15 minutes
- Cook Time: 10 minutes
- Category: Appetizers & Snacks
- Cuisine: American
Nutrition
- Serving Size: 1 treat
- Calories: 120 kcal
- Sugar: 14g
- Sodium: 95mg
- Fat: 3g
- Saturated Fat: 1.5g
- Unsaturated Fat: 1g
- Trans Fat: 0g
- Carbohydrates: 24g
- Fiber: 0.5g
- Protein: 1g
- Cholesterol: 5mg
Keywords: eyeball marshmallow treats, Halloween snacks, Rice Krispie treats, spooky desserts, kid-friendly snacks