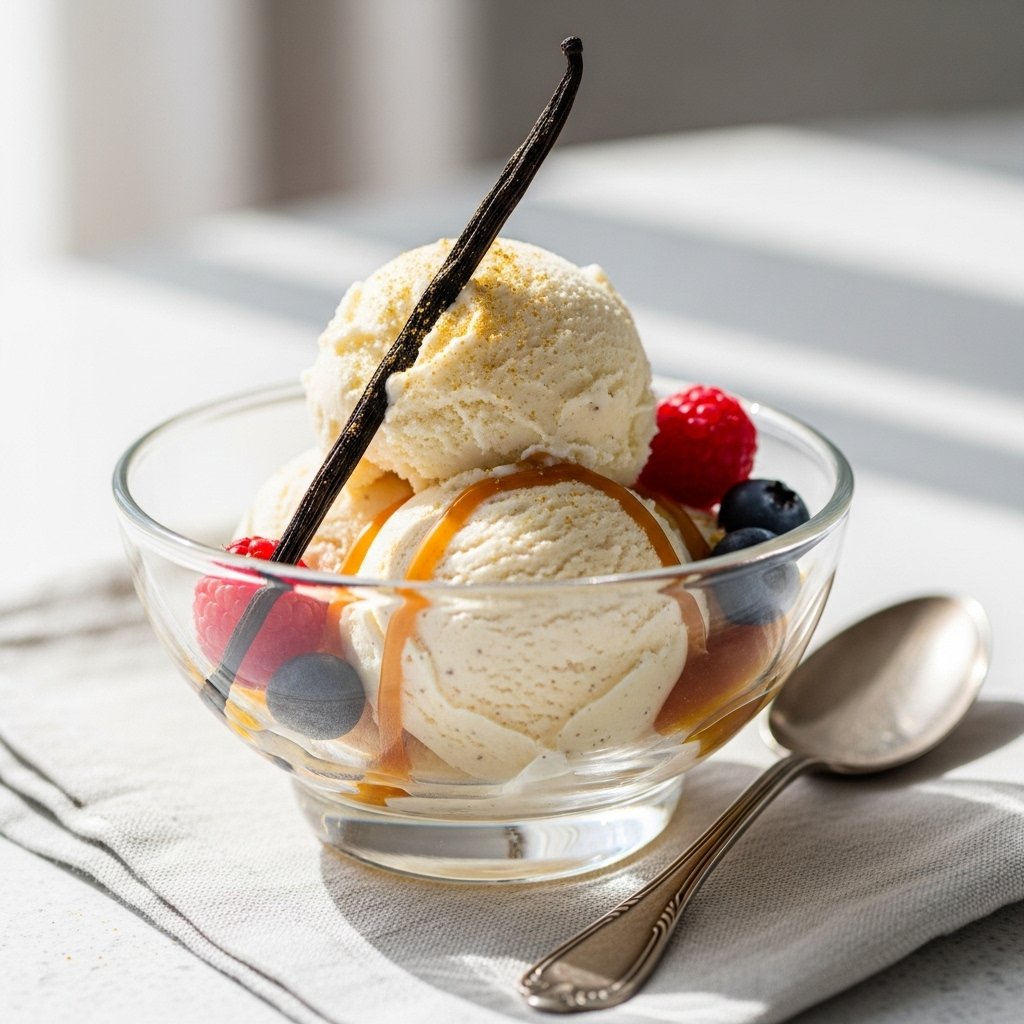
There’s nothing quite like the simple pleasure of a scoop of perfectly smooth, intensely flavored vanilla ice cream. Forget store-bought tubs – making your own Creamy Homemade Vanilla Ice Cream is a surprisingly easy and incredibly rewarding experience. This classic recipe is designed to deliver that rich, velvety texture and pure vanilla taste that evokes summer memories and comforting indulgence.
Whether you’re serving it à la mode with a warm apple pie, building the ultimate sundae, or simply enjoying it by the spoonful, this vanilla ice cream is the ultimate blank canvas for dessert perfection. With just a few basic ingredients and an ice cream maker, you’re on your way to a treat that’s far superior to anything you can buy.
Why Homemade Vanilla Ice Cream Reigns Supreme
Opting for homemade over store-bought offers a world of difference in taste and quality. Here’s why you’ll fall in love with making your own:
- Unmatched Creaminess: Control over ingredients means a richer, smoother texture without artificial stabilizers.
- Pure Vanilla Flavor: You get to choose the quality of your vanilla, resulting in an authentic and aromatic taste that shines through. Did you know vanilla comes from orchids? You can learn more about its fascinating history and cultivation on Wikipedia.
- Simple Ingredients: No mysterious additives, just fresh dairy, sugar, and real vanilla.
- Customizable Fun: A fantastic base for any mix-ins you can dream of – chocolate chips, fruit swirls, or cookie crumbles!
Essential Ingredients for Success
Our classic vanilla ice cream recipe relies on a few high-quality components to achieve its signature taste and texture. Here’s what you’ll need:
- Heavy Cream: This is the backbone of your ice cream’s richness and body. Don’t skimp!
- Whole Milk: Balances the richness of the cream, contributing to a perfect consistency.
- Granulated Sugar: Provides sweetness and helps create that smooth texture.
- Pure Vanilla Extract: The star of the show! Use a good quality extract for the best flavor.
- Vanilla Bean Paste (Optional): For an extra boost of vanilla flavor and those beautiful speckled aesthetics.
- Pinch of Salt: A tiny bit of salt enhances all the flavors, making the vanilla pop.
Crafting Your Perfect Vanilla Ice Cream: Step-by-Step
Making ice cream is more about patience than complicated techniques. Follow these steps for a flawless batch every time.
The Base: Mixing and Chilling
The first crucial step is creating and thoroughly chilling your ice cream base. This ensures your ice cream churns efficiently and results in a smoother final product.
Churning to Perfection
An ice cream maker transforms your liquid base into a soft-serve consistency. Follow your machine’s instructions carefully, as churning times can vary.
Freezing for Firmness
After churning, your ice cream will be soft. A few hours in the freezer will allow it to firm up to that perfect scoopable texture.
Serving Suggestions & Storage Tips
Your homemade vanilla ice cream is incredibly versatile. Serve it as a standalone dessert, with fresh berries, a drizzle of caramel, or alongside a warm brownie. For the best experience, let it sit out for 5-10 minutes before scooping to soften slightly.
Store any leftovers in an airtight container in the freezer. Press a piece of plastic wrap directly onto the surface of the ice cream before sealing to prevent ice crystals from forming. It will keep well for up to two weeks, though it rarely lasts that long!
Conclusion
This Creamy Homemade Vanilla Ice Cream recipe is a timeless classic that brings joy with every spoonful. Its rich flavor and silky-smooth texture are a testament to the simple magic of homemade desserts. So go ahead, dust off that ice cream maker, gather your ingredients, and treat yourself and your loved ones to the best vanilla ice cream you’ll ever taste. Happy churning!
FAQs
Do I need an ice cream maker for this recipe?
Yes, this recipe is designed for an ice cream maker to achieve the creamiest texture. While you can try a no-churn method by freezing and stirring frequently, an ice cream maker yields superior results.
What’s the best way to prevent ice crystals in homemade ice cream?
To prevent ice crystals, ensure your mixture is well-chilled before churning. After churning, transfer the ice cream to an airtight container and press plastic wrap directly onto the surface before freezing.
Can I substitute pure vanilla extract with imitation vanilla?
While imitation vanilla can be used, pure vanilla extract offers a much richer, more authentic flavor that truly elevates the taste of homemade ice cream. For the best results, always opt for pure vanilla.
How long does homemade vanilla ice cream last in the freezer?
When stored in an airtight container, homemade vanilla ice cream is best enjoyed within 1-2 weeks. After that, its texture and flavor may start to degrade.
Creamy Homemade Vanilla Ice Cream
Learn how to make rich, velvety homemade vanilla ice cream with this easy classic recipe, perfect for a refreshing summer dessert.
- Total Time: 4 hours 40 minutes (including chill & freeze time)
- Yield: 6 servings 1x
Ingredients
2 cups heavy cream
1 cup whole milk
3/4 cup granulated sugar
1 tablespoon pure vanilla extract
1 teaspoon vanilla bean paste (optional)
Pinch of salt
Instructions
Step 1: Combine Ingredients: In a large mixing bowl, whisk together the heavy cream, whole milk, granulated sugar, pure vanilla extract, vanilla bean paste (if using), and a pinch of salt. Whisk vigorously until the granulated sugar is completely dissolved.
Step 2: Chill the Mixture: Cover the bowl tightly with plastic wrap and refrigerate the mixture for at least 2 hours, or preferably overnight. A well-chilled base is essential for the best ice cream texture.
Step 3: Churn the Ice Cream: Pour the thoroughly chilled mixture into your ice cream maker. Churn according to the manufacturer’s instructions, typically for 20-25 minutes, until the ice cream reaches the consistency of soft-serve.
Step 4: Transfer and Cover: Once churned, carefully transfer the soft ice cream into an airtight freezer-safe container. Press a piece of plastic wrap directly onto the surface of the ice cream to minimize air exposure and prevent ice crystals from forming.
Step 5: Freeze to Harden: Place the covered container in the freezer for at least 4 hours, or until the ice cream is firm enough to scoop easily. For optimal hardness, freezing overnight is recommended.
Step 6: Serve and Enjoy: When ready to serve, remove the ice cream from the freezer and let it sit at room temperature for 5-10 minutes to soften slightly, making it easier to scoop. Serve in bowls or cones and savor your homemade treat!
Notes
For an extra rich flavor, you can steep a split vanilla bean in the cream and milk mixture while chilling, then remove it before churning. If you don’t have an ice cream maker, you can attempt a no-churn method by freezing the mixture in a shallow pan and stirring every 30-45 minutes until firm, but results may vary in creaminess.
- Prep Time: 15 minutes
- Cook Time: 25 minutes
- Category: Dessert
- Method: Chilling, Churning
- Cuisine: American
- Diet: Vegetarian
Nutrition
- Serving Size: 1/2 cup
- Calories: 280 kcal
- Sugar: 27g
- Sodium: 45mg
- Fat: 19g
- Saturated Fat: 12g
- Unsaturated Fat: 6g
- Trans Fat: 1g
- Carbohydrates: 28g
- Fiber: 0g
- Protein: 3g
- Cholesterol: 75mg
Keywords: vanilla ice cream, homemade ice cream, summer dessert, classic ice cream, easy ice cream recipe