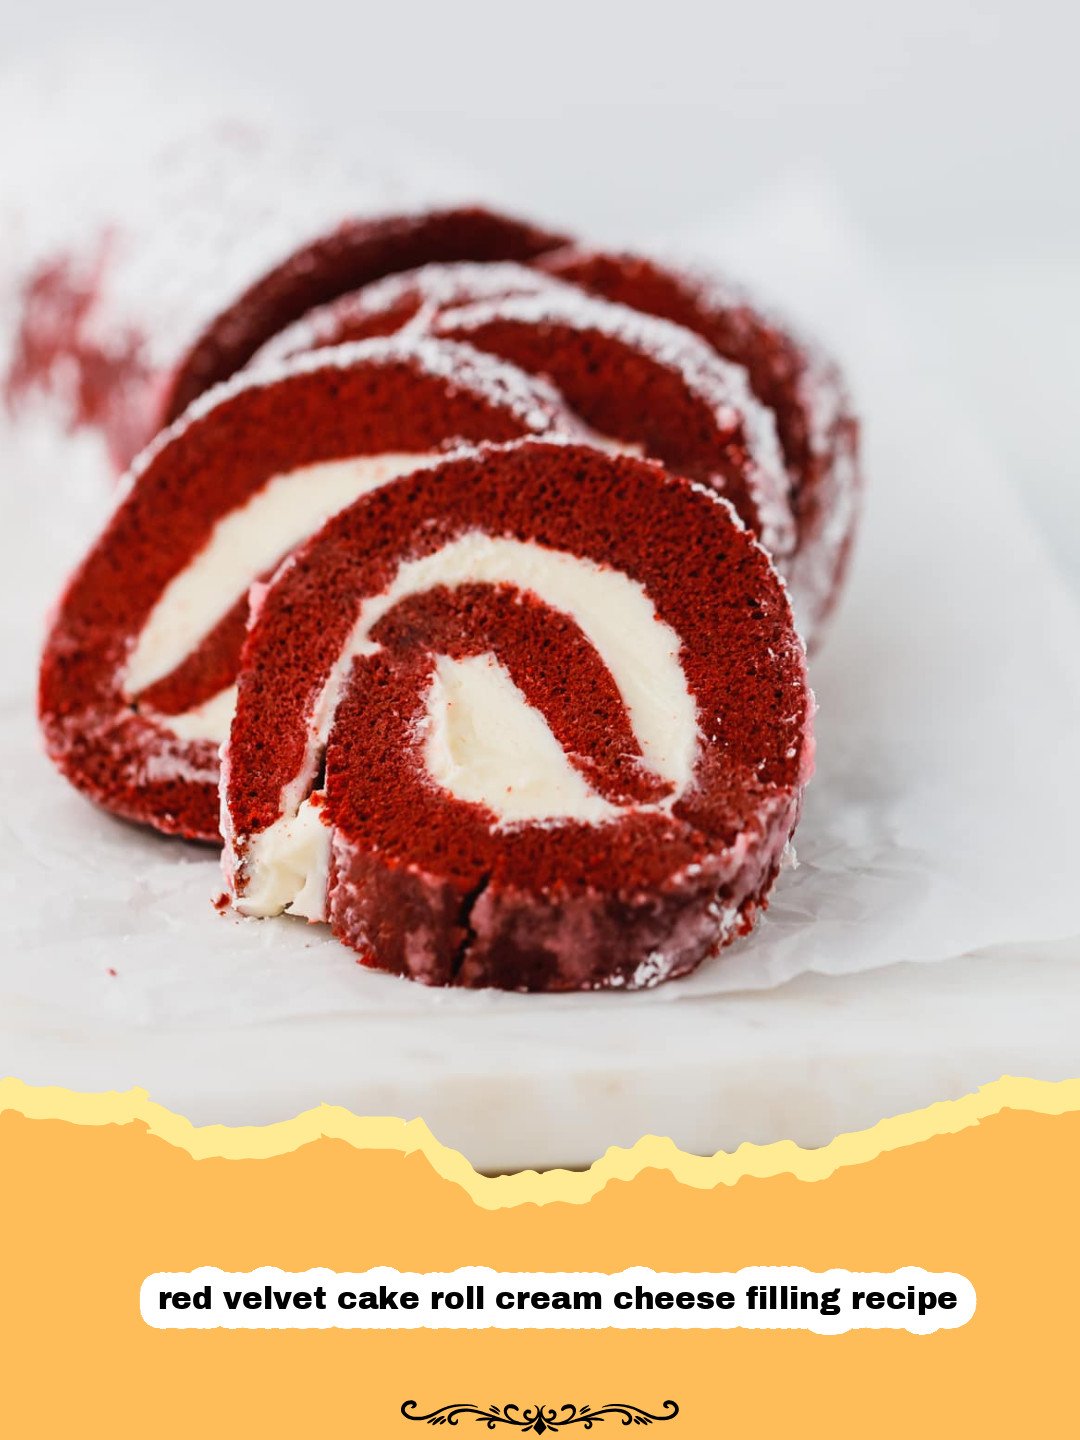
There are some desserts that just transport you back to a specific moment in time, a feeling of pure warmth and nostalgia. For me, that’s often a red velvet creation. I remember my grandmother, with her flour-dusted apron and a twinkle in her eye, attempting a ‘fancy’ cake roll for a special occasion. It was a disaster, bless her heart – cracks everywhere, filling oozing out, but it tasted divine and we loved it all the same. That memory, mixed with my own culinary ambition, fueled my journey to conquer the art of the cake roll. Many years and many cracked cakes later, I finally perfected the ultimate red velvet cake roll cream cheese filling recipe. This isn’t just any cake; it’s a symphony of flavors and textures: a tender, moist, crimson-hued sponge cake rolled around a luscious, tangy cream cheese filling. It’s a showstopper, a conversation starter, and surprisingly, not nearly as intimidating as it looks. Trust me, if I can go from a grandma’s charmingly disastrous attempt to this elegant dessert, you absolutely can too. Get ready to impress your friends and family with this absolutely irresistible red velvet cake roll cream cheese filling recipe that promises to be a new family favorite.
Why This Recipe is a Must-Try
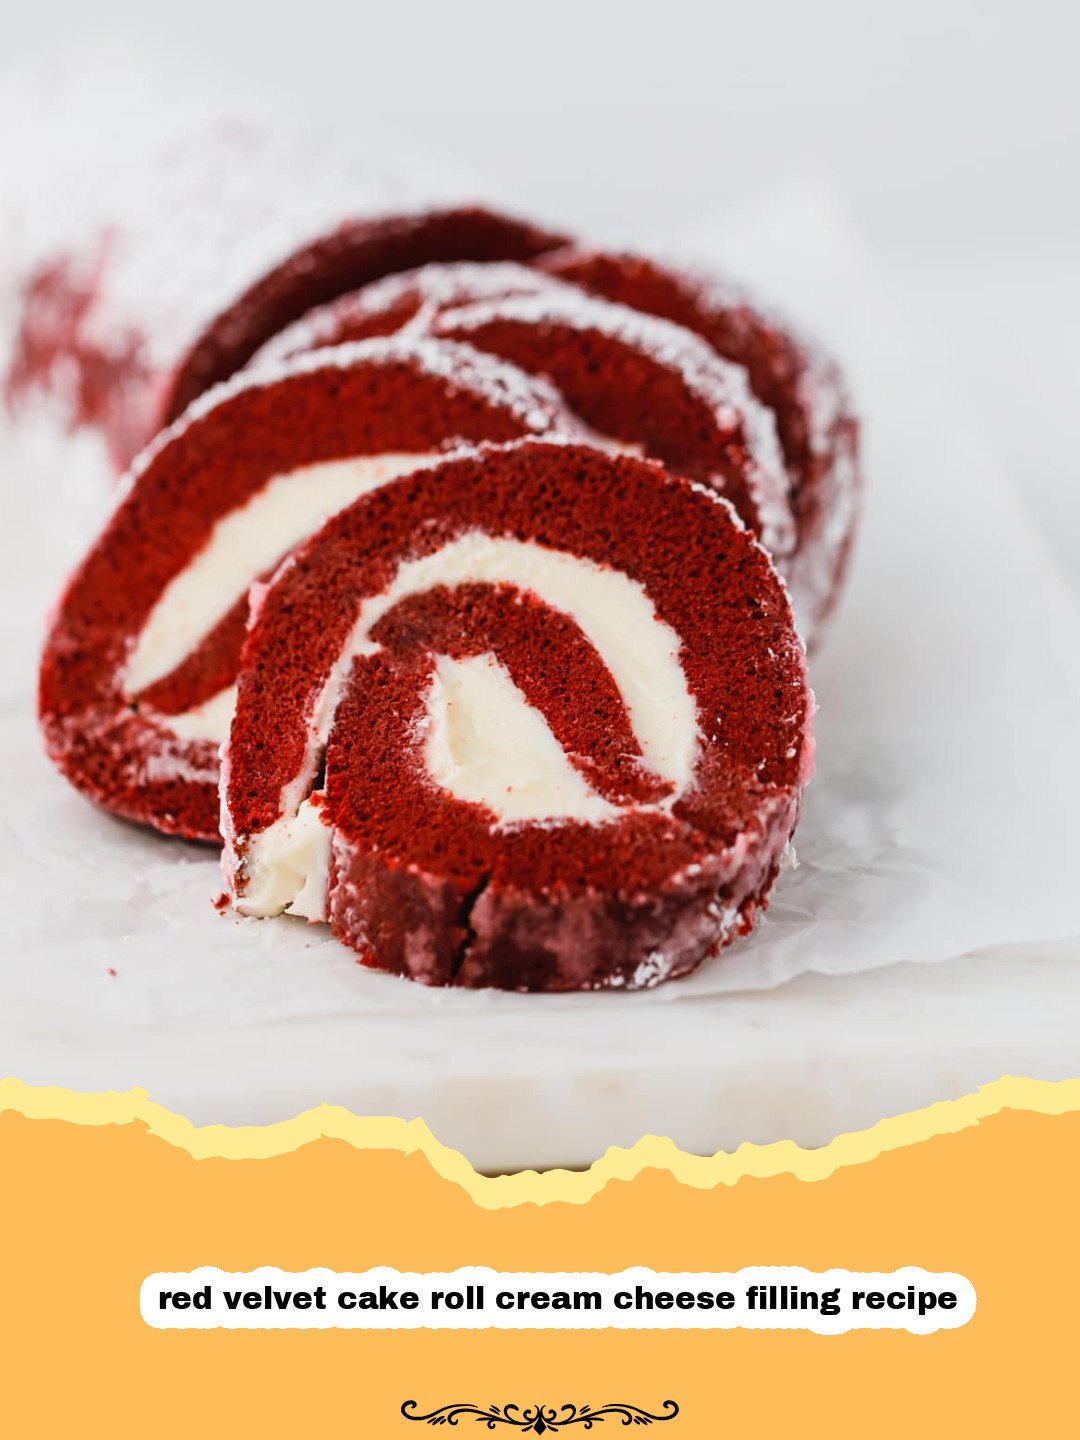
- Stunning Presentation: The vibrant red cake contrasting with the pristine white filling makes for an incredibly elegant dessert that’s perfect for holidays, parties, or any special gathering. It truly looks like it came from a high-end bakery.
- Perfect Balance of Flavors: The subtle tang of buttermilk and cocoa in the cake perfectly complements the rich, sweet, and slightly tart cream cheese filling. Each bite of this red velvet cake roll cream cheese filling recipe is a delightful experience.
- Surprisingly Simple to Master: While a cake roll might seem daunting, my step-by-step guide and pro tips break down the process, making it approachable for bakers of all skill levels. You’ll be amazed at how easy it is to create this beautiful red velvet cake roll.
- Make-Ahead Friendly: This red velvet cake roll cream cheese filling recipe can be prepared in advance, making it an ideal dessert for entertaining. Just roll, chill, and slice when you’re ready to serve!
Key Ingredient Notes
Getting the best results from your red velvet cake roll cream cheese filling recipe starts with understanding your ingredients. Each component plays a crucial role in achieving that perfect cake and filling.
Cake Flour
Using cake flour instead of all-purpose flour is absolutely essential for this red velvet cake roll cream cheese filling recipe. Cake flour has a lower protein content, which results in a much finer, more tender crumb – exactly what you want for a delicate cake roll that won’t crack when rolled. If you don’t have cake flour, you can make a substitute: for every cup of cake flour needed, measure out 1 cup of all-purpose flour, remove 2 tablespoons, and then replace those 2 tablespoons with cornstarch. Sift this mixture several times to ensure it’s well combined.
Buttermilk
Buttermilk is a cornerstone of classic red velvet, contributing to both its signature tang and its incredible moistness. The acidity in buttermilk reacts with the baking soda, creating a light and airy texture. Don’t skip it! If you find yourself without buttermilk, you can easily make a homemade version. For every cup of buttermilk required for this red velvet cake roll cream cheese filling recipe, add 1 tablespoon of white vinegar or lemon juice to a liquid measuring cup, then fill the rest of the cup with regular milk (any fat percentage is fine). Let it sit for 5-10 minutes until it slightly curdles. While not quite as rich as real buttermilk, it works wonderfully in a pinch.
Good Quality Cocoa Powder and Red Food Coloring
For that iconic red velvet hue, you’ll need both unsweetened cocoa powder and red food coloring. The cocoa provides the subtle chocolate flavor that makes red velvet so distinctive, while the red food coloring delivers the vibrant color. I recommend using a high-quality gel food coloring for the best results, as it provides a more intense color without adding too much liquid to the batter. A good quality cocoa powder, like Dutch-processed cocoa, will also enhance the depth of flavor. Remember, the goal is a deep, rich red, not a bright pink, and the cocoa helps achieve that luxurious depth alongside the coloring in this red velvet cake roll cream cheese filling recipe.
Step-by-Step Guide with Pro Tips
Creating a beautiful red velvet cake roll cream cheese filling recipe is easier than you think when you follow these steps carefully. The key is in the technique, especially when it comes to rolling!
For the Red Velvet Cake:
Step 1: Preheat your oven to 350°F (175°C). Line a 10×15-inch jelly roll pan with parchment paper, leaving an overhang on the short sides. Lightly grease the parchment paper.
Step 2: In a large bowl, whisk together the cake flour, cocoa powder, baking soda, and salt. Set aside.
Step 3: In another bowl, cream together the softened butter and granulated sugar until light and fluffy. Beat in the eggs one at a time, ensuring each is fully incorporated before adding the next. Stir in the vanilla extract.
Step 4: In a small bowl, combine the buttermilk and red food coloring. Gradually add the dry ingredients to the wet ingredients, alternating with the buttermilk mixture, beginning and ending with the dry ingredients. Mix until just combined; do not overmix. The batter for this red velvet cake roll cream cheese filling recipe should be smooth and vibrant.
Step 5: Pour the batter evenly into the prepared jelly roll pan and spread it to the edges. Bake for 12-15 minutes, or until the cake springs back when lightly touched and a toothpick inserted into the center comes out clean. Be careful not to overbake, as this can make the cake dry and prone to cracking.
Step 6: While the cake is baking, lay out a clean kitchen towel on a flat surface and dust it generously with powdered sugar. This prevents the cake from sticking. Immediately after removing the cake from the oven, invert it onto the prepared sugared towel. Carefully peel off the parchment paper.
Step 7: Starting from a short end, carefully roll the cake (along with the towel) into a tight spiral. Place the rolled cake, seam-side down, on a wire rack and let it cool completely. This step is crucial for training the cake to hold its rolled shape without cracking when you add the filling. Ensure it’s completely cool before unrolling, which may take up to an hour or more.
For the Cream Cheese Filling:
Step 8: In a medium bowl, beat the softened cream cheese and softened butter together until smooth and creamy. Ensure there are no lumps.
Step 9: Gradually add the powdered sugar, one cup at a time, beating well after each addition until fully incorporated. Mix in the vanilla extract until the filling is light, fluffy, and smooth. This is the heart of your red velvet cake roll cream cheese filling recipe, so make sure it’s perfect.
Assembling the Red Velvet Cake Roll:
Step 10: Once the cake is completely cooled, gently unroll it. If it resists, be patient and slowly ease it open. Spread the cream cheese filling evenly over the entire surface of the cake, leaving a small border (about 1/2 inch) on all edges. This ensures the filling doesn’t squish out excessively when rolled.
Step 11: Starting from the same short end you began with earlier, carefully re-roll the cake, this time without the towel. Roll it tightly but gently. You’ll notice how the pre-rolling step helps immensely here.
Step 12: Wrap the finished red velvet cake roll tightly in plastic wrap and refrigerate for at least 1-2 hours, or preferably overnight, to allow the cake to set and the flavors to meld. This chilling time is essential for clean slices.
Step 13: Before serving, dust the red velvet cake roll cream cheese filling recipe generously with powdered sugar for a beautiful finish. Use a sharp, thin knife to cut slices, wiping the knife clean between each cut for the cleanest presentation.
Variations & Serving Suggestions
This red velvet cake roll cream cheese filling recipe is fantastic on its own, but there are always ways to customize it to your taste or for different occasions. For those who love a bit of crunch, consider sprinkling some finely chopped toasted pecans or walnuts over the cream cheese filling before rolling. The nutty texture provides a wonderful contrast to the soft cake and creamy filling. You could also add a touch of almond extract to the cream cheese filling for a subtle flavor twist, or even a hint of orange zest to brighten it up.
For a festive touch during the holidays, you might garnish slices with fresh cranberries and a sprig of mint, making it a perfect addition alongside your Ultimate Classic Holiday Fruitcake with Buttery Glaze. In warmer months, fresh raspberries or strawberries make a beautiful and delicious accompaniment, adding a burst of fruity freshness that complements the red velvet flavor perfectly. For a truly decadent experience, serve slices with a dollop of whipped cream or a scoop of vanilla bean ice cream. If you’re looking for another delightful rolled dessert, check out my Irresistible Cinnamon Swirl Snickerdoodle Blondies, which offers a different take on a rolled treat.
Storing your finished red velvet cake roll is simple. Keep it tightly wrapped in plastic wrap in the refrigerator for up to 3-4 days. For longer storage, slices can be frozen individually and then transferred to an airtight container. When you want a slice, simply thaw it in the refrigerator. Using quality storage containers, like those found in Basics Glass Food Storage sets, can help maintain freshness. This versatility makes the red velvet cake roll cream cheese filling recipe an ideal dessert for meal prepping or just having a treat ready whenever a craving strikes.
Nutrition Information
| Nutrient | Amount per serving (approx.) |
|---|---|
| Calories | 350 kcal |
| Carbohydrate Content | 45 g |
| Cholesterol Content | 75 mg |
| Fat Content | 18 g |
| Fiber Content | 1 g |
| Protein Content | 4 g |
| Saturated Fat Content | 11 g |
| Serving Size | 1 slice (approx. 1/12 of roll) |
| Sodium Content | 210 mg |
| Sugar Content | 35 g |
| Trans Fat Content | 0 g |
| Unsaturated Fat Content | 7 g |
Please note that these are estimated values and can vary based on specific ingredient brands and preparation methods. This red velvet cake roll cream cheese filling recipe is a treat meant to be enjoyed!
Conclusion
There you have it – the definitive guide to creating a truly show-stopping red velvet cake roll cream cheese filling recipe. From my grandmother’s first wobbly attempt to this perfectly rolled masterpiece, it’s been a journey of passion and perseverance. This recipe is more than just a dessert; it’s an opportunity to create something beautiful, delicious, and memorable. Don’t be shy about trying your hand at this elegant cake roll; the joy of slicing into that vibrant spiral of red cake and creamy white filling is truly unmatched. Whether you’re making it for a special occasion or just to treat yourself, this red velvet cake roll cream cheese filling recipe is sure to become a beloved staple in your baking repertoire. Happy baking!
FAQs
Why did my red velvet cake roll crack when I unrolled it?
The most common reason for a cake roll to crack is overbaking, which makes the cake dry and less pliable. Another reason could be not rolling it immediately after baking with the sugared towel, which trains the cake to hold its shape. Ensure the cake is also completely cooled before unrolling and filling.
Can I make this red velvet cake roll cream cheese filling recipe ahead of time?
Absolutely! This red velvet cake roll is an excellent make-ahead dessert. You can prepare the entire roll, wrap it tightly in plastic wrap, and store it in the refrigerator for up to 3-4 days. This allows the flavors to meld beautifully and makes for easier slicing.
What’s the best way to get a vibrant red color for my red velvet cake roll?
For the most vibrant red color in your red velvet cake roll, use a high-quality gel food coloring. Gel colors are more concentrated than liquid food colorings, allowing you to achieve a deep, rich red without altering the cake batter’s consistency significantly. Be sure to mix it thoroughly with the buttermilk before adding to the batter.
How should I store leftover red velvet cake roll?
Store any leftover red velvet cake roll tightly wrapped in plastic wrap or in an airtight container in the refrigerator for up to 3-4 days. The cream cheese filling requires refrigeration. For longer storage, you can slice the cake roll and freeze individual slices for up to 1 month, thawing them in the refrigerator before serving.
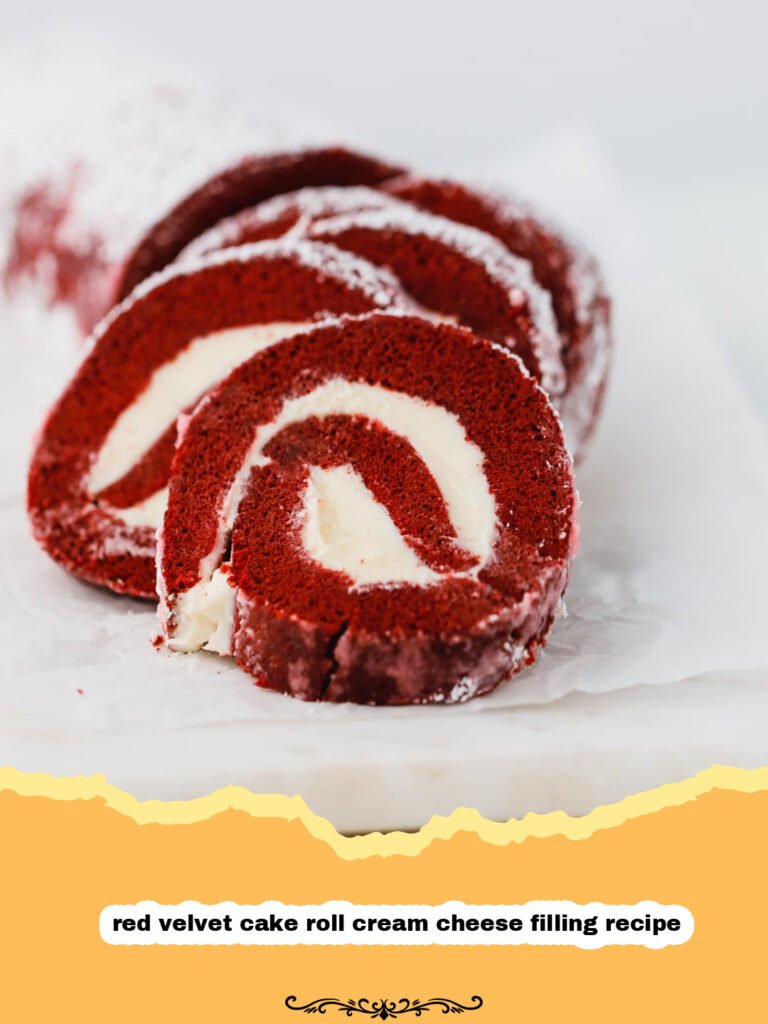
The Ultimate Red Velvet Cake Roll with Cream Cheese Filling
A stunning and delicious red velvet cake roll featuring a tender, moist, crimson sponge cake meticulously rolled with a rich, tangy cream cheese filling. Perfect for holidays and special occasions, this recipe provides step-by-step instructions and pro tips for a flawless dessert.
- Total Time: 2 hours 30 minutes (includes cooling and chilling)
- Yield: 12 servings 1x
Ingredients
1 1/4 cups cake flour, sifted
1/4 cup unsweetened cocoa powder
1 teaspoon baking soda
1/2 teaspoon salt
1/2 cup (1 stick) unsalted butter, softened
1 cup granulated sugar
2 large eggs
1 teaspoon vanilla extract
1/2 cup buttermilk
2 tablespoons red gel food coloring
Powdered sugar, for dusting
FOR THE CREAM CHEESE FILLING:
8 ounces (1 block) cream cheese, softened
1/2 cup (1 stick) unsalted butter, softened
4 cups powdered sugar, sifted
1 teaspoon vanilla extract
Instructions
Step 1: Preheat your oven to 350°F (175°C). Line a 10×15-inch jelly roll pan with parchment paper, leaving an overhang on the short sides. Lightly grease the parchment paper.
Step 2: In a large bowl, whisk together the sifted cake flour, cocoa powder, baking soda, and salt. Set aside.
Step 3: In another large bowl, using an electric mixer, cream together the softened butter and granulated sugar until light and fluffy, about 2-3 minutes. Beat in the eggs one at a time, ensuring each is fully incorporated before adding the next. Stir in the vanilla extract.
Step 4: In a small bowl, combine the buttermilk and red gel food coloring. Gradually add the dry ingredients to the wet ingredients, alternating with the buttermilk mixture, beginning and ending with the dry ingredients. Mix on low speed until just combined; do not overmix. The batter should be smooth and vibrant.
Step 5: Pour the batter evenly into the prepared jelly roll pan and spread it to the edges with an offset spatula. Bake for 12-15 minutes, or until the cake springs back when lightly touched and a toothpick inserted into the center comes out clean. Do not overbake.
Step 6: While the cake is baking, lay out a clean kitchen towel (free of lint) on a flat surface and dust it generously with powdered sugar. Immediately after removing the cake from the oven, invert the hot cake onto the prepared sugared towel. Carefully peel off the parchment paper.
Step 7: Starting from a short end, carefully roll the cake (along with the towel) into a tight spiral. Place the rolled cake, seam-side down, on a wire rack and let it cool completely to room temperature. This trains the cake to hold its shape.
Step 8: While the cake cools, prepare the cream cheese filling. In a medium bowl, beat the softened cream cheese and softened butter together with an electric mixer until smooth and creamy, about 2 minutes. Ensure there are no lumps.
Step 9: Gradually add the sifted powdered sugar, one cup at a time, beating well after each addition until fully incorporated. Mix in the vanilla extract until the filling is light, fluffy, and smooth.
Step 10: Once the cake is completely cooled (this is critical to prevent the filling from melting), gently unroll it. Spread the cream cheese filling evenly over the entire surface of the cake, leaving a small border (about 1/2 inch) on all edges.
Step 11: Starting from the same short end you began with earlier, carefully re-roll the cake, this time without the towel. Roll it tightly but gently. If any filling squeezes out, simply clean it with a small spatula.
Step 12: Wrap the finished red velvet cake roll tightly in plastic wrap and refrigerate for at least 1-2 hours, or preferably overnight, to allow the cake to set and the flavors to meld, making it easier to slice.
Step 13: Before serving, dust the red velvet cake roll generously with additional powdered sugar for a beautiful finish. Use a sharp, thin knife to cut slices, wiping the knife clean between each cut for the cleanest presentation. Enjoy!
Notes
Ensure your ingredients are at room temperature for the best results, especially the butter and cream cheese for the filling. Do not overbake the cake, as it will dry out and crack easily when rolled. Chilling the finished roll is crucial for clean slices and for the flavors to fully develop. If you don’t have cake flour, you can make your own by removing 2 tablespoons from 1 cup of all-purpose flour and replacing it with 2 tablespoons of cornstarch, then sifting it well.
- Prep Time: 45 minutes
- Cook Time: 15 minutes
- Category: Baked Goods
- Cuisine: American
Nutrition
- Serving Size: 1 slice (approx. 1/12 of roll)
- Calories: 350 kcal
- Sugar: 35 g
- Sodium: 210 mg
- Fat: 18 g
- Saturated Fat: 11 g
- Unsaturated Fat: 7 g
- Trans Fat: 0 g
- Carbohydrates: 45 g
- Fiber: 1 g
- Protein: 4 g
- Cholesterol: 75 mg
Keywords: red velvet cake roll, cream cheese filling, red velvet recipe, cake roll recipe, dessert, baking, holiday dessert, easy cake roll, red velvet cake