

Sourdough bread is more than just a recipe; it is a labor of love that transforms three simple ingredients into something truly magical. I still remember the first time I attempted to capture the wild yeasts of the air in a jar of flour and water. It felt like a middle school science experiment gone right. For weeks, I nurtured my starter, naming it ‘Dough-rothy,’ and watched with bated breath as it bubbled and grew. When that first loaf finally emerged from the oven—shattering-crisp crust, airy crumb, and that signature tangy aroma—I was hooked. It wasn’t perfect; it was a bit flat, and I’d accidentally burned the bottom, but the taste was unlike anything I had ever bought at a grocery store. This journey into the world of sourdough bread has taught me patience, the beauty of slow food, and the immense satisfaction of feeding my family with something I created from scratch.
Why This Recipe is a Must-Try
- Incredible Texture: This sourdough bread features a crackly, golden-brown crust and a soft, open crumb that is perfect for sandwiches or dipping in soup.
- Digestibility: The long fermentation process breaks down gluten and phytic acid, making sourdough bread much easier on the stomach than commercial yeast breads.
- No Special Equipment Required: While a Dutch oven helps, you can achieve professional results with basic kitchen tools you likely already own.
- Rich Flavor Profile: By using a slow, cold-proof method, we develop complex lactic and acetic acids that give the loaf its iconic sourdough bread tang.
Key Ingredient Notes
To make a spectacular sourdough bread, you need to pay close attention to the quality of your ingredients. Here are the three pillars of a great loaf:
The Sourdough Starter
Your starter is the engine of the recipe. It needs to be active and bubbly. I recommend feeding your starter about 4 to 8 hours before you plan to mix your dough. A great tip for keeping your starter healthy is to store it in clear containers. I personally use Basics Glass Food Storage because it allows me to see the bubbles and mark the height of the starter with a rubber band, ensuring I know exactly when it has peaked.
Bread Flour vs. All-Purpose
While you can use all-purpose flour, I highly recommend a high-protein bread flour for your sourdough bread. The higher protein content (usually around 12-13%) provides the strength needed to hold those beautiful air pockets during the long fermentation process. If you want a more rustic feel, you can substitute 10% of the bread flour with whole wheat or rye flour.
The Water
Chlorine in tap water can sometimes inhibit the growth of wild yeast. If your tap water smells strongly of chlorine, let it sit out on the counter overnight or use filtered water. The temperature should be lukewarm (about 80°F or 27°C) to keep the yeast happy without over-stimulating them too quickly.

Step-by-Step Guide with Pro Tips
Creating sourdough bread is a process that spans about 24 hours, but most of that time is hands-off. It’s all about working with the rhythm of the dough.
1. The Autolyse and Mixing
Start by mixing your flour and water. Let it rest for 30 minutes to an hour. This process, called autolyse, allows the flour to fully hydrate and begin gluten development before the salt and starter are even added. Once rested, dimple in your active starter and salt. This is the foundation of your sourdough bread.
2. Bulk Fermentation and Folding
Instead of traditional kneading, we use ‘stretch and folds.’ Every 30 minutes for the first two hours, reach under the dough, pull it up, and fold it over itself. This builds strength gently. You’ll notice the sourdough bread dough transforming from a shaggy mess into a smooth, silky ball. After the folds, let the dough sit undisturbed until it has grown by about 50% in volume.
3. Shaping and Cold Proof
Gently tip the dough onto a floured surface. Fold the edges into the center to create tension, then flip it over. Using your hands, tension the dough into a tight round or oval. Place it into a proofing basket (banneton) or a bowl lined with a floured tea towel. Now comes the secret to great flavor: the cold proof. Place your sourdough bread in the refrigerator for 12 to 18 hours. This slow chill develops the flavor and makes the dough easier to score.
4. Scoring and Baking
Preheat your oven and Dutch oven to 500°F (260°C). Carefully flip the dough onto parchment paper. Use a sharp blade or ‘lame’ to cut a deep slash across the top. This allows the sourdough bread to expand in a controlled way. Bake covered for 20 minutes, then remove the lid and lower the heat to 450°F (230°C) for another 20 minutes until the crust is a deep mahogany color.
Variations & Serving Suggestions
Once you master the basic sourdough bread, the possibilities are endless. You can add roasted garlic and rosemary during the folding stage, or even fold in some cheddar cheese and jalapeños for a spicy kick. If you find yourself with extra dough or looking for other ways to use fermentation, you might enjoy using a similar hydration technique for a Gourmet Homemade Pizza with Mushrooms Mozzarella and Truffle.
Sourdough bread is best served slightly warm with salted butter, but it also makes incredible toast. If your loaf starts to get a bit dry after a few days, don’t let it go to waste! It makes a fantastic base for croutons or can be transformed into crunchy snacks similar to Homemade Baked Pita Chips by slicing it thin, brushing with olive oil, and baking until crisp.
Nutrition Information
Here is the nutritional breakdown for a single serving of this sourdough bread (based on a medium slice).
| Metric | Amount per Serving |
|---|---|
| Calories | 185 kcal |
| Carbohydrates | 36g |
| Protein | 6g |
| Fat | 1g |
| Fiber | 2g |
| Sodium | 380mg |
| Sugar | 0.5g |
Conclusion
Mastering sourdough bread is a journey, not a destination. Each loaf you bake will teach you something new about the temperature of your kitchen, the thirst of your flour, and the personality of your starter. Don’t be discouraged if your first few loaves aren’t perfect; even a ‘failed’ loaf of sourdough bread usually tastes better than anything from the store. Happy baking, and may your kitchen always smell of fresh bread!
FAQs
Why is my sourdough bread flat?
A flat loaf is usually caused by either under-proofing, over-proofing, or a weak starter. Ensure your starter is doubling in size consistently before use and practice building more surface tension during the shaping stage.
How do I get a crispier crust on my sourdough bread?
Steam is the key to a crispy crust. Using a Dutch oven traps the moisture escaping from the dough, keeping the surface soft longer so it can expand and eventually brown into a thin, crackly crust.
Can I use all-purpose flour for sourdough bread?
Yes, you can use all-purpose flour, but your bread may have a softer texture and less ‘oven spring’ compared to using bread flour. All-purpose flour has less protein, which means a weaker gluten structure.
How long does sourdough bread stay fresh?
Because of its natural acidity, sourdough bread stays fresh longer than commercial bread, usually about 3-5 days at room temperature when stored in a paper bag or bread box.
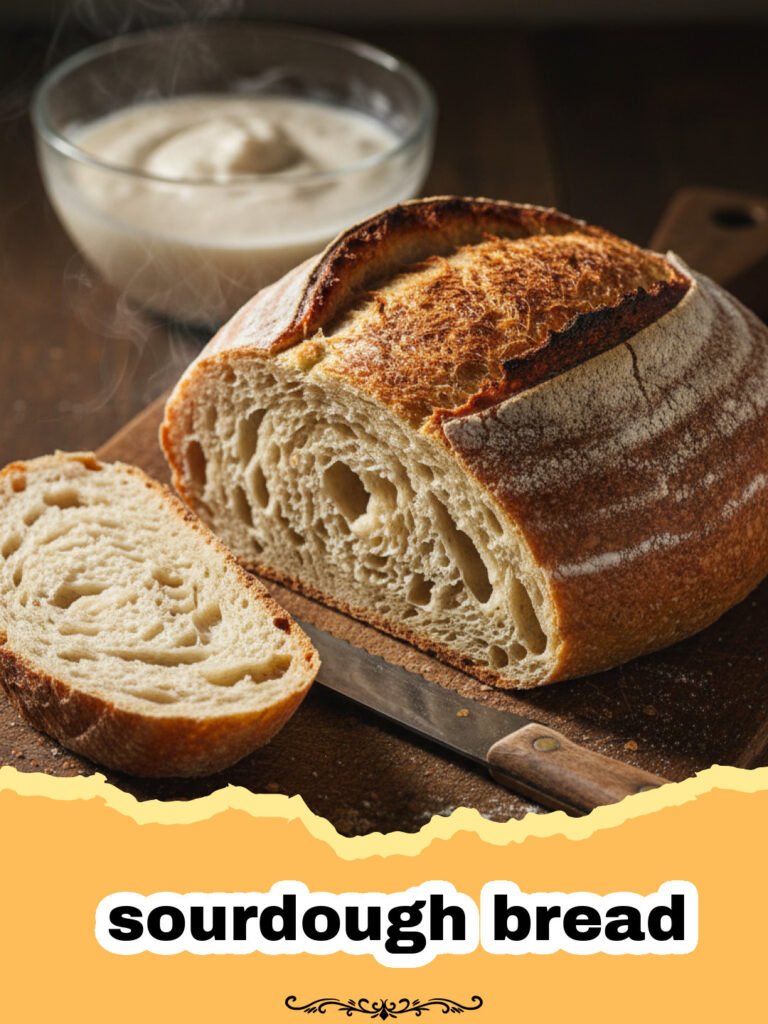
Classic Overnight Sourdough Bread
A foolproof, long-fermentation sourdough bread recipe with a crispy crust and soft, chewy interior.
- Total Time: 20 hours
- Yield: 1 loaf (12 slices) 1x
Ingredients
100g active sourdough starter (fed and bubbly)
350g lukewarm water (approx. 80°F)
500g high-protein bread flour
10g fine sea salt
Instructions
Step 1: In a large glass bowl, whisk together 100g of active starter and 350g of lukewarm water until the starter is mostly dissolved and the water looks milky.
Step 2: Add 500g of bread flour to the bowl and mix by hand or with a sturdy spatula until no dry flour remains. Cover with a damp cloth and let rest (autolyse) for 45 minutes.
Step 3: Sprinkle 10g of sea salt over the dough. Wet your hands and squeeze the salt into the dough, then perform a series of ‘stretch and folds’ for 2 minutes to incorporate. Cover and rest.
Step 4: Perform 4 sets of stretch and folds every 30 minutes. To do this, grab one side of the dough, pull it up high, and fold it over into the center. Rotate the bowl and repeat 4 times per set.
Step 5: Let the dough rest at room temperature (70-75°F) for the bulk fermentation. This usually takes 4-6 hours, or until the dough has increased in volume by about 50% and shows small bubbles on the surface.
Step 6: Gently turn the dough onto a lightly floured surface. Fold the edges toward the center to create a round shape. Let rest for 15 minutes (bench rest).
Step 7: Final shaping: Flip the dough over and tension it against the counter to create a tight skin. Place upside down into a floured banneton or cloth-lined bowl.
Step 8: Cover the basket with plastic or place in a bag and refrigerate for 12 to 18 hours. This is the cold proof that develops the sourdough bread flavor.
Step 9: Preheat your oven to 500°F (260°C) with a Dutch oven inside for at least 45 minutes. Carefully transfer the cold dough onto parchment paper, score the top with a razor blade, and lower it into the hot Dutch oven.
Step 10: Bake with the lid on for 20 minutes. Reduce the oven temperature to 450°F (230°C), remove the lid, and bake for another 20-25 minutes until the crust is deep golden brown. Let cool on a wire rack for at least 2 hours before slicing.
Notes
Always wait for the bread to cool completely before slicing. Cutting into hot sourdough bread can cause the interior to become gummy.
- Prep Time: 30 minutes
- Cook Time: 45 minutes
- Category: Baked Goods
- Cuisine: Artisan
Nutrition
- Serving Size: 1 slice
- Calories: 185
- Sugar: 0.5g
- Sodium: 380mg
- Fat: 1g
- Saturated Fat: 0.1g
- Unsaturated Fat: 0.5g
- Trans Fat: 0g
- Carbohydrates: 36g
- Fiber: 2g
- Protein: 6g
- Cholesterol: 0mg
Keywords: sourdough bread, artisan bread, wild yeast, homemade bread, sourdough starter, fermented bread




