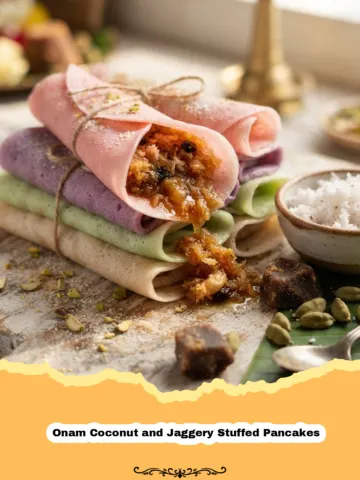
There’s something truly magical about a perfectly made crepe. For me, it takes me straight back to my grandmother’s kitchen on chilly Saturday mornings. The gentle sizzle of butter in the pan, the delicate aroma filling the air, and the patient anticipation as she expertly swirled the thin batter into a golden disc. This classic French crepe recipe isn’t just a meal; it’s a memory, a warm hug, and a foundational skill every home cook should master. I remember trying my hand at crepes for the first time as a teenager, convinced I had the technique down. My initial attempts were… let’s just say, more akin to thick pancakes than elegant crepes. But with my grandmother’s gentle guidance and a bit of perseverance, I learned the subtle art of the swirl, the perfect heat, and the crucial resting time for the batter. Each delicate crepe was a testament to her wisdom and my growing culinary confidence. Now, I’m so excited to share her cherished crepe recipe with you, promising you the same light, airy, and utterly versatile crepes that have brought so much joy to my family over the years. This isn’t just a recipe; it’s an invitation to create your own cherished memories.
Why This Crepe Recipe is a Must-Try
- Unrivaled Texture: Our crepe recipe yields crepes that are incredibly thin, delicate, and melt-in-your-mouth tender, far superior to any store-bought variety.
- Effortless Versatility: This basic crepe recipe is a blank canvas! Perfect for both sweet and savory fillings, making it ideal for breakfast, brunch, dessert, or even a light dinner.
- Surprisingly Simple: Don’t be intimidated by the elegance of crepes. This easy crepe recipe breaks down the process, making it accessible even for beginners, ensuring perfect results every time.
- Crowd-Pleaser: Whether you’re hosting a brunch or looking for a special treat, this crepe recipe is guaranteed to impress family and friends with minimal fuss.
Key Ingredient Notes
While the ingredients for this crepe recipe are simple, their quality and preparation make a significant difference in the final product:
- All-Purpose Flour: Sifting your flour is a small but mighty step. It prevents lumps and ensures a smooth, uniform batter, which is essential for that delicate crepe texture. Avoid overmixing once the flour is added, as this can develop gluten too much, leading to tougher crepes.
- Eggs (Room Temperature): Using room temperature eggs helps them incorporate more smoothly and evenly into the batter. This results in a more cohesive batter that cooks more consistently. Large eggs are standard for this crepe recipe.
- Milk and Water Combination: This specific blend is key to achieving the perfect delicate consistency for our crepe recipe. Whole milk adds richness and helps with browning, while water thins the batter just enough to ensure those signature paper-thin crepes. You can use full-fat or reduced-fat milk, but whole milk generally gives the best flavor and texture.
- Melted Butter: Unsalted butter not only adds incredible flavor but also helps prevent sticking and contributes to the beautiful golden color of the crepes. Make sure it’s melted and slightly cooled before adding it to the batter to avoid cooking the eggs prematurely.

Step-by-Step Guide with Pro Tips
Making crepes is a delightful culinary dance, and with these pro tips, you’ll master this classic crepe recipe in no time!
Making the Batter
The foundation of any great crepe recipe is its batter. Achieving the right consistency is crucial for thin, delicate crepes.
- Step 1: In a large bowl, whisk together the all-purpose flour, granulated sugar (if using), and salt. Make sure there are no lumps in the dry ingredients.
- Step 2: In a separate medium bowl, lightly whisk the eggs. Add the milk, water, and melted butter to the eggs, whisking until well combined.
- Step 3: Gradually add the wet ingredients to the dry ingredients, whisking continuously until the batter is smooth. Be careful not to overmix; a few small lumps are fine and will disappear during resting. Overmixing can lead to tough crepes.
- Pro Tip for the batter: For an extra smooth batter, especially if you find it lumpy, pour it through a fine-mesh sieve. This step guarantees a silky batter perfect for this crepe recipe.
Resting the Batter (Crucial Step!)
This is often overlooked but is arguably the most important step for a perfect crepe recipe.
- Step 4: Cover the bowl with plastic wrap and refrigerate for at least 30 minutes, or up to 2 hours. Ideally, let it rest for an hour. This resting period allows the flour to fully hydrate, resulting in a more tender crepe, and gives the gluten a chance to relax, preventing rubbery crepes. It also allows any air bubbles to dissipate, ensuring a smooth finish.
- Pro Tip for resting: You can make the batter for this crepe recipe the night before and store it in the refrigerator. This makes for an incredibly quick and easy breakfast or brunch the next morning. If storing, give it a good whisk before cooking. For convenient storage, consider using Basics Glass Food Storage containers for your batter.
Cooking the Crepes
The cooking process for this crepe recipe requires a bit of rhythm and practice, but it’s incredibly rewarding.
- Step 5: Heat a 8-inch non-stick skillet or crepe pan over medium-low heat. Lightly brush the pan with a little extra melted butter or oil. You don’t need much, just enough to coat the surface. The right temperature is key for this crepe recipe; if it’s too hot, your crepes will burn; too cool, and they won’t brown properly.
- Step 6: Pour about 1/4 cup of batter into the center of the hot pan. Immediately lift the pan off the heat and quickly tilt and swirl the pan in a circular motion to evenly coat the bottom with a thin layer of batter. Work quickly to ensure an even spread.
- Step 7: Return the pan to the heat and cook for 1-2 minutes, or until the edges begin to crisp and turn golden brown, and the surface of the crepe looks set.
- Step 8: Gently loosen the edges of the crepe with a thin spatula. Once loose, slide the spatula under the center and carefully flip the crepe. Cook for another 30 seconds to 1 minute on the second side, until lightly golden.
- Pro Tip for flipping: If you’re feeling brave, you can try flipping it with a quick flick of the wrist! Otherwise, a thin, wide spatula is your best friend for this crepe recipe.
- Step 9: Slide the cooked crepe onto a plate. Repeat with the remaining batter, brushing the pan with butter as needed. Stack the cooked crepes on top of each other; the residual heat will keep them warm and pliable. This crepe recipe yields beautiful, consistent results with practice.
- Pro Tip for consistent cooking: If your crepes start to become too brown too quickly, lower the heat slightly. If they aren’t browning enough, increase it. Don’t be afraid to adjust.
Variations & Serving Suggestions
The beauty of this classic crepe recipe lies in its adaptability. Once you have your perfectly cooked crepes, the possibilities are endless!
Sweet Crepe Ideas:
- Classic Lemon & Sugar: A timeless favorite. Simply squeeze fresh lemon juice and sprinkle with granulated sugar.
- Nutella & Banana: Spread warm Nutella and add sliced bananas. A delicious and satisfying combination.
- Fresh Berries & Whipped Cream: Fill with seasonal berries like strawberries, raspberries, or blueberries, and a dollop of homemade whipped cream.
- Fruit Compote: A warm berry or apple compote makes an elegant filling for this crepe recipe.
- Caramelized Apples & Cinnamon: Sautéed apple slices with a hint of cinnamon are a cozy option.
- Ricotta & Honey: A light and subtly sweet filling for your perfect crepe recipe.
- Powdered Sugar: A simple dusting of powdered sugar is often all you need to highlight the crepe itself.
Savory Crepe Ideas:
- Ham & Cheese: A classic choice. Fill with shredded Gruyere or cheddar and sliced deli ham.
- Spinach & Feta: Sautéed spinach, crumbled feta, and a touch of nutmeg.
- Mushrooms & Swiss: Sautéed mushrooms with melted Swiss cheese.
- Chicken & Asparagus: Diced cooked chicken and steamed asparagus with a light cream sauce.
- Smoked Salmon & Cream Cheese: A sophisticated brunch option, perfect with capers and fresh dill.
- Eggs & Chives: Scrambled eggs and fresh chives for a hearty breakfast crepe. For another delightful breakfast option, check out our Sweet & Sticky Perfection: The Ultimate Pull-Apart Monkey Bread Recipe.
Nutrition Information
| Nutrient | Amount Per Serving (1 crepe) |
|---|---|
| Calories | 90 kcal |
| Carbohydrate Content | 10g |
| Cholesterol Content | 35mg |
| Fat Content | 4g |
| Fiber Content | 0.3g |
| Protein Content | 3g |
| Saturated Fat Content | 2g |
| Serving Size | 1 crepe |
| Sodium Content | 60mg |
| Sugar Content | 2g |
| Trans Fat Content | 0.1g |
| Unsaturated Fat Content | 1.5g |
Conclusion
There you have it – the ultimate classic French crepe recipe that will transport you straight to a Parisian café or, perhaps, to my grandmother’s kitchen. This crepe recipe is more than just a list of ingredients and steps; it’s an invitation to create, to savor, and to share. Don’t be afraid to experiment with fillings, both sweet and savory, and make this crepe recipe truly your own. The delicate texture and versatile nature of these crepes make them a perfect canvas for your culinary imagination. So grab your whisk, heat up your pan, and get ready to enjoy the simple pleasure of homemade crepes. Happy cooking!
FAQs
What makes a good crepe recipe different from a pancake recipe?
Crepes are much thinner and more delicate than pancakes, primarily due to a runnier batter (often with more liquid and fewer leavening agents). Pancake batter is thicker, designed to create fluffier results, while crepe batter is meant to spread thinly and evenly across the pan, yielding a flexible, paper-thin wrapper perfect for rolling or folding.
Can I make crepe batter ahead of time?
Absolutely! Making the crepe batter ahead of time is highly recommended. It allows the flour to fully hydrate and the gluten to relax, resulting in more tender and pliable crepes. You can prepare the batter for this crepe recipe up to 24 hours in advance and store it in an airtight container in the refrigerator. Just give it a good whisk before cooking.
What are common reasons crepes stick to the pan?
Crepes typically stick to the pan for a few reasons: the pan isn’t hot enough, it’s not adequately greased, or the batter is too thick. Ensure your non-stick pan is well-heated over medium-low heat and lightly brushed with butter or oil before each crepe. If your batter seems too thick after resting, you can thin it with a tablespoon or two of milk or water.
How do you store leftover crepes and rewarm them?
Cooked crepes can be stored in the refrigerator for up to 3-4 days. To prevent them from sticking together, layer them with parchment paper. Wrap the stack tightly in plastic wrap or place in an airtight container. To rewarm, you can gently heat them in a lightly greased skillet over low heat for 10-20 seconds per side, or microwave them briefly until warm and pliable.

Classic French Crepe Recipe
A truly authentic and easy crepe recipe that yields delicate, thin, and versatile crepes perfect for any filling, sweet or savory. This timeless classic is surprisingly simple to master.
- Total Time: 1 hour
- Yield: 12–15 crepes 1x
Ingredients
1 cup (120g) all-purpose flour
2 large eggs, at room temperature
1/2 cup (120ml) whole milk
1/2 cup (120ml) water
1/4 teaspoon salt
2 tablespoons (28g) unsalted butter, melted and slightly cooled, plus extra for greasing
1 tablespoon granulated sugar (optional, for sweet crepes)
Instructions
Step 1: In a large bowl, whisk together the all-purpose flour, granulated sugar (if using), and salt until well combined and lump-free.
Step 2: In a separate medium bowl, lightly whisk the eggs. Add the milk, water, and melted butter to the eggs, whisking until fully incorporated.
Step 3: Gradually pour the wet ingredients into the dry ingredients, whisking continuously until the batter is smooth. Be careful not to overmix; a few small lumps are acceptable.
Step 4: Cover the bowl with plastic wrap and refrigerate for at least 30 minutes, or up to 2 hours. This resting period is crucial for tender crepes.
Step 5: Heat an 8-inch non-stick skillet or crepe pan over medium-low heat. Lightly brush the pan with a small amount of melted butter or oil.
Step 6: Pour about 1/4 cup of batter into the center of the hot pan. Immediately lift the pan off the heat and quickly tilt and swirl the pan in a circular motion to evenly coat the bottom with a thin layer of batter.
Step 7: Return the pan to the heat and cook for 1-2 minutes, or until the edges begin to crisp, turn golden brown, and the surface of the crepe looks set.
Step 8: Gently loosen the edges with a thin spatula, then carefully slide the spatula under the center and flip the crepe. Cook for another 30 seconds to 1 minute on the second side, until lightly golden.
Step 9: Slide the cooked crepe onto a plate. Repeat with the remaining batter, brushing the pan with butter as needed for each crepe. Stack the cooked crepes to keep them warm and pliable.
Notes
For the most tender crepes, ensure the batter rests for at least 30 minutes. This allows the flour to fully hydrate and the gluten to relax.
- Prep Time: 15 minutes
- Cook Time: 20 minutes
- Category: Breakfast, Dessert
- Cuisine: French
Keywords: crepes, French crepes, thin pancakes, easy crepes, sweet crepes, savory crepes, breakfast, dessert, classic crepe recipe