There’s something inherently magical about the holiday season, isn’t there? For me, it always brings back a flood of cherished memories, particularly those from my childhood. I remember chilly December afternoons, the scent of pine needles in the air, and my grandmother’s kitchen filled with a quiet hum of activity. It wasn’t always about elaborate meals or store-bought gifts; often, the greatest joy came from simple, heartfelt creations. One year, she introduced me to the wonder of a salt dough ornaments recipe, and it completely captivated my young imagination. We spent hours, hands dusted with flour and glitter, pressing cookie cutters into the pliable dough, giggling as we imagined each piece hanging proudly on our tree. Each ornament, imperfectly shaped and painted with childlike enthusiasm, became a tiny time capsule, holding the warmth of those moments. That tradition has stayed with me, and now, I’m so excited to share our beloved salt dough ornaments recipe with you, hoping it brings as much joy and memory-making to your home as it has to mine.
This isn’t just about making decorations; it’s about crafting experiences, slowing down, and connecting with loved ones. It’s about creating something beautiful and personal, a tangible reminder of holiday cheer that can be treasured for years to come. Whether you’re a seasoned crafter or looking for a fun, easy project to do with kids, this salt dough ornaments recipe is wonderfully forgiving and incredibly rewarding. So, roll up your sleeves, gather your ingredients, and let’s make some magic!
Why This Salt Dough Ornaments Recipe is a Must-Try
- Budget-Friendly Fun: Made from common pantry staples, this salt dough ornaments recipe is incredibly economical, allowing for boundless creativity without breaking the bank. It’s the perfect craft for holiday decorating on a shoestring budget.
- Perfect for All Ages: From tiny tots exploring textures to adults rediscovering their inner artist, this salt dough ornaments recipe is a fantastic activity for the whole family. It’s safe, non-toxic, and simple enough for even the youngest helpers.
- Endlessly Customizable: The possibilities for decoration are limitless! Paint, glitter, stamps, natural elements – you can personalize each ornament to match your holiday theme, or create unique gifts that truly reflect the giver’s heart. Every salt dough ornaments recipe yields unique results.
- Heartfelt Keepsakes & Gifts: Hand-made ornaments carry a special charm that store-bought ones can’t replicate. They make beautiful, thoughtful gifts for friends, family, or teachers, and become cherished heirlooms that tell a story year after year.
Key Ingredient Notes for Your Salt Dough Ornaments Recipe
While the beauty of a classic salt dough ornaments recipe lies in its simplicity, understanding the role of each ingredient can elevate your crafting experience and ensure the best results.
All-Purpose Flour
Flour is the structural backbone of our salt dough. While you might be tempted to experiment with other flours, all-purpose flour provides the best consistency for kneading, rolling, and holding its shape. It’s what gives the dough its smooth, pliable texture. Ensure your flour isn’t stale for optimal results, as fresh flour generally yields a better, less crumbly dough. This humble ingredient is crucial for a successful salt dough ornaments recipe.
Fine Grain Salt
The salt in our salt dough ornaments recipe isn’t just for texture; it’s also a preservative! Fine grain salt (like table salt) is recommended because it dissolves more easily into the dough, resulting in a smoother consistency without gritty bits. Coarse salts can make the dough lumpy and harder to work with. The salt helps prevent mold and decay, allowing your beautiful creations to last for many years.
Warm Water
Water binds everything together. Using warm water helps the salt dissolve more effectively, creating a more uniform and pliable dough. It’s crucial to add water gradually. Too much water will make your dough sticky and difficult to handle, requiring more flour to compensate, which can alter the final texture. Too little, and it will be crumbly. Aim for a dough that is firm but soft, like playdough. The right amount of water is key to a perfectly workable salt dough ornaments recipe.
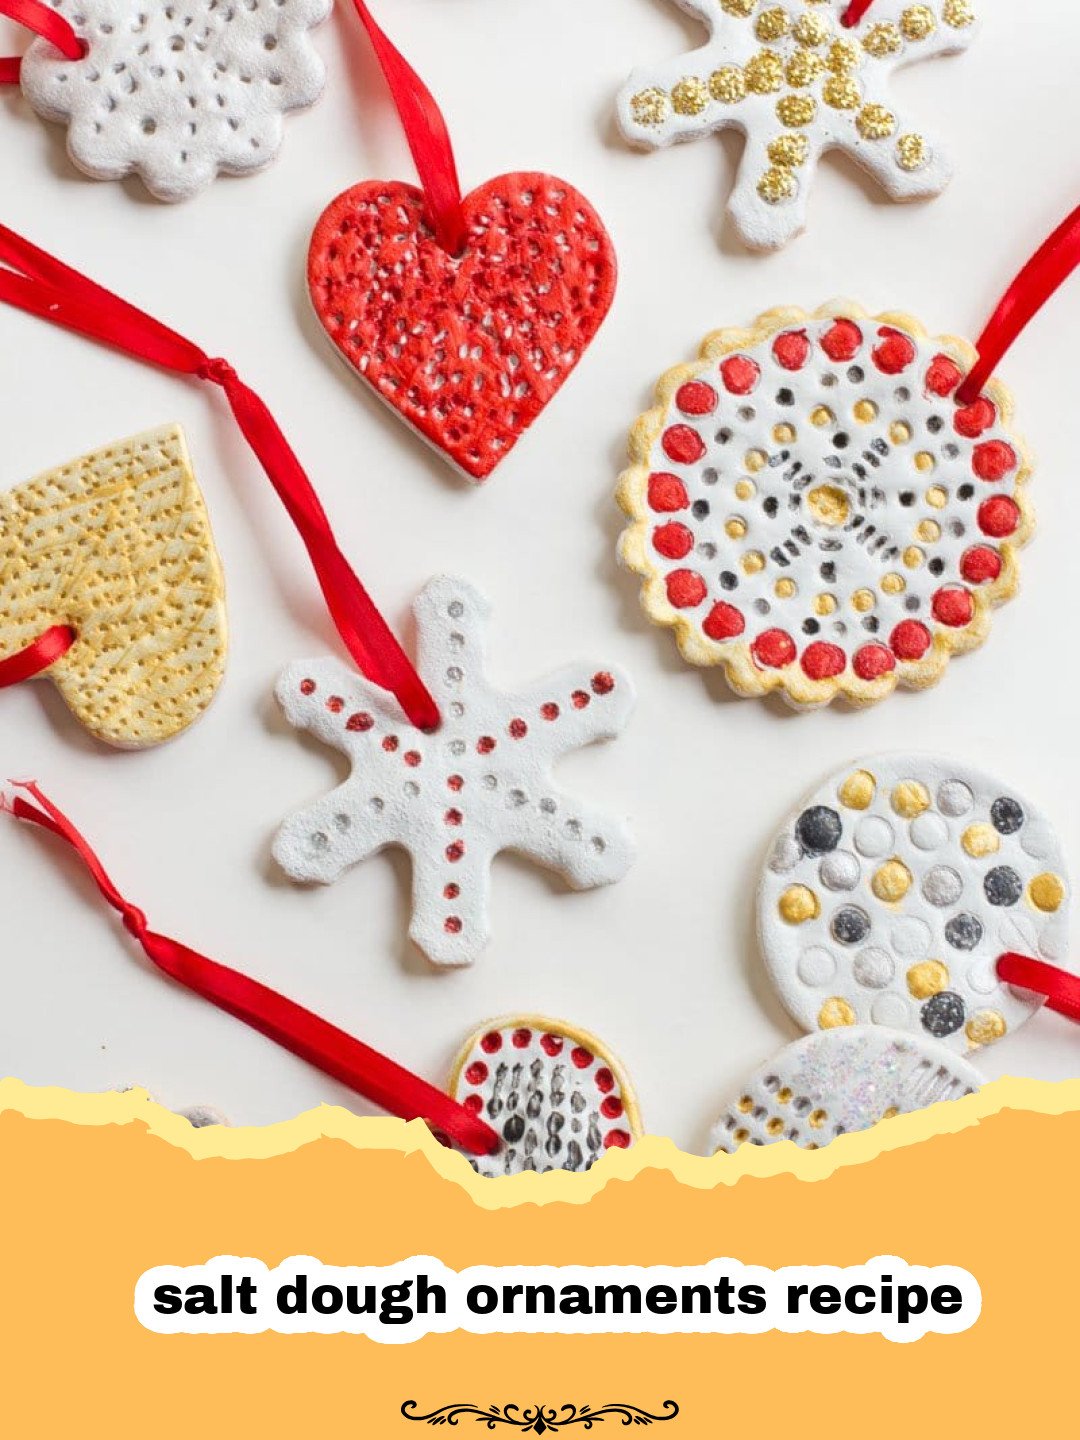
Step-by-Step Guide with Pro Tips for Your Salt Dough Ornaments Recipe
Let’s get crafting! Follow these detailed steps to create beautiful salt dough ornaments that will brighten your home or make perfect gifts.
Gather Your Tools and Ingredients
Before you begin, ensure you have:
- Mixing bowl
- Measuring cups and spoons
- Rolling pin
- Cookie cutters (holiday shapes, stars, hearts, etc.)
- Drinking straw (for making hanging holes)
- Baking sheets lined with parchment paper
- Optional: stamps, texture mats, glitter, paint, sealant, ribbon
Making the Salt Dough
Step 1: In a large mixing bowl, combine 2 cups of all-purpose flour and 1 cup of fine grain salt. Whisk them together thoroughly until well combined. This ensures even distribution of the salt, which is important for the dough’s texture and preservation. For a comprehensive guide on just the dough, check out our The Ultimate Guide to Making Classic Salt Dough for Crafts.
Step 2: Gradually add 1 cup of warm water to the dry ingredients, mixing with a spoon or your hands as you go. Add a little at a time, incorporating it fully before adding more. The exact amount of water can vary slightly depending on your flour and humidity. You want a dough that comes together but isn’t overly sticky.
Step 3: Once the dough forms a shaggy ball, turn it out onto a lightly floured surface. Knead the dough for 5-10 minutes until it’s smooth, elastic, and no longer sticky. If it feels too sticky, add a tiny bit more flour; if it’s too dry, add a few drops of water. This kneading process is vital for developing the dough’s structure and making it easy to roll.
Shaping Your Ornaments
Step 4: Preheat your oven to its lowest setting, typically around 200°F (95°C). Line several baking sheets with parchment paper. This prevents sticking and makes for easy cleanup.
Step 5: Using a rolling pin, roll out the salt dough on a lightly floured surface to an even thickness of about 1/4 inch (6mm). Consistency is key here; if your ornaments are different thicknesses, they will bake unevenly, leading to some being overcooked or undercooked. This is a critical step for a uniform salt dough ornaments recipe.
Step 6: Use your favorite cookie cutters to cut out shapes from the rolled dough. Place the cut-out shapes onto the prepared baking sheets, leaving a little space between each ornament.
Step 7: Before baking, use a drinking straw or a small skewer to create a hole at the top of each ornament. This hole is where you’ll thread your ribbon or string for hanging after baking. Make sure the hole is large enough for your chosen hanging material, and position it far enough from the edge so it won’t break during baking or handling.
Baking and Drying
Step 8: Bake the ornaments in your preheated oven. The baking time will vary significantly depending on the size and thickness of your ornaments, typically ranging from 2-4 hours, or even longer for very thick pieces. The goal is to slowly dry out the dough, not to brown it. Flip the ornaments periodically to ensure even drying.
Pro Tip: If your oven runs hot, or if you notice any browning, slightly open the oven door with a wooden spoon to allow some moisture to escape and reduce the temperature. The ornaments are done when they are hard to the touch and feel light, with no soft spots.
Step 9: Once baked, turn off the oven and leave the ornaments inside to cool completely. This slow cooling helps prevent cracking. If you’re not satisfied with the dryness after baking, you can air dry them for another 24-48 hours in a warm, dry place. This extra drying time ensures longevity for your salt dough ornaments recipe creations.
Decorating Your Masterpieces
Step 10: Once your salt dough ornaments are completely cool and dry, the fun part begins: decorating! You can use acrylic paints, tempera paints, or even permanent markers to add color and detail. Let your creativity soar! Consider adding glitter while the paint is still wet for extra sparkle, or use stamps to create intricate patterns.
Step 11: After the paint and any embellishments have dried completely, it’s highly recommended to seal your ornaments. Use a clear, non-toxic sealant, like Mod Podge, a clear acrylic spray, or even a clear varnish. This step protects the paint, prevents moisture absorption, and gives your ornaments a beautiful, durable finish, ensuring your salt dough ornaments recipe results last for years.
Step 12: Finally, thread a ribbon, twine, or string through the holes you made earlier. Tie a loop for hanging, and your beautiful, handmade salt dough ornaments are ready to adorn your tree, mantle, or to be given as heartfelt gifts!
Variations & Display Suggestions
This classic salt dough ornaments recipe is just the starting point! Here are some creative ways to customize and display your beautiful creations:
- Texture & Imprints: Before baking, press lace, leaves, twigs, stamps, or even your child’s handprint or footprint into the rolled-out dough for unique textures and personalized keepsakes. These make incredibly sentimental gifts!
- Coloring the Dough: Add a few drops of food coloring to the water before mixing with the dry ingredients to create colored salt dough. This can be fun for themed ornaments, or to provide a base color before painting.
- Scented Ornaments: After baking, you can add a few drops of essential oils (like cinnamon, orange, or pine) to the back of the unsealed ornament, or incorporate ground spices like cinnamon, nutmeg, or cloves into the dry ingredients for a subtle, festive scent.
- Glitter Galore: Mix fine glitter directly into the dry ingredients for a subtle shimmer throughout the ornament, or apply glitter glue after painting for bold sparkle.
- Alternative Embellishments: Before baking, carefully press small beads (that are oven-safe), dried berries, or sprigs of herbs into the dough for a natural, rustic look. Be mindful of materials that might burn.
- Year-Round Decor: Don’t limit your salt dough creations to just Christmas! Use different cookie cutters for other holidays (Halloween bats, Easter bunnies, Valentine’s hearts) or everyday decor. You could even create gift tags, garlands, or decorative wall hangings.
- Gift Tags: Punch smaller holes and write names with a fine-tipped marker, then attach them to gifts with a festive ribbon. For other holiday craft ideas, consider our The Ultimate Classic Gingerbread House Recipe for a Magical Holiday.
- Storage: To ensure your beautiful creations last, once they are completely dry and sealed, store them in airtight containers, ideally with some padding, in a cool, dry place. Glass food storage containers work wonderfully for this, keeping them safe and sound until next season. I often use Basics Glass Food Storage for delicate items.
Nutrition Information
Please note: This salt dough recipe is intended for crafting and decorative purposes only. It is not safe for consumption. The nutritional information provided is for informational purposes only, based on ingredients, and does not reflect a consumable food product.
| Nutrient | Amount Per Serving |
|---|---|
| Calories | 0 kcal |
| Carbohydrate Content | 0 g |
| Cholesterol Content | 0 mg |
| Fat Content | 0 g |
| Fiber Content | 0 g |
| Protein Content | 0 g |
| Saturated Fat Content | 0 g |
| Serving Size | Not for consumption |
| Sodium Content | 0 mg (from consumed food) |
| Sugar Content | 0 g |
| Trans Fat Content | 0 g |
| Unsaturated Fat Content | 0 g |
Conclusion
There’s a simple, profound joy in creating something with your own hands, especially when it involves loved ones and the spirit of the holidays. This easy salt dough ornaments recipe offers more than just pretty decorations; it provides an opportunity to create lasting memories, share laughter, and infuse your home with a personalized touch of festive cheer. Each little ornament, imperfect and unique, holds a story and a moment in time, ready to be rediscovered year after year. So, embrace the floury mess, the vibrant paints, and the simple pleasure of crafting. I hope this salt dough ornaments recipe becomes a cherished tradition in your family, just as it has in mine. Happy crafting and happy holidays!
FAQs
Are salt dough ornaments edible?
No, salt dough ornaments are not edible. They are made from flour, salt, and water, but the high salt content makes them unsafe for consumption. This recipe is strictly for decorative crafting.
How long do salt dough ornaments last?
When properly baked, dried, and sealed, salt dough ornaments can last for many years, even decades! Storing them in a cool, dry place away from moisture will help preserve them.
How do you prevent salt dough from bubbling or cracking?
To prevent bubbling or cracking, ensure your dough is rolled to an even thickness. Most importantly, bake your ornaments at a very low temperature (around 200u00b0F/95u00b0C) for a longer duration, allowing them to dry out slowly rather than cook. Allowing them to cool gradually in the oven after baking also helps.
Can I air dry salt dough ornaments instead of baking them?
Yes, you can air dry salt dough ornaments, but it takes much longer u2013 typically 2-3 days, or even up to a week, depending on thickness and humidity. Baking provides a faster, more controlled drying process and generally results in more durable ornaments.
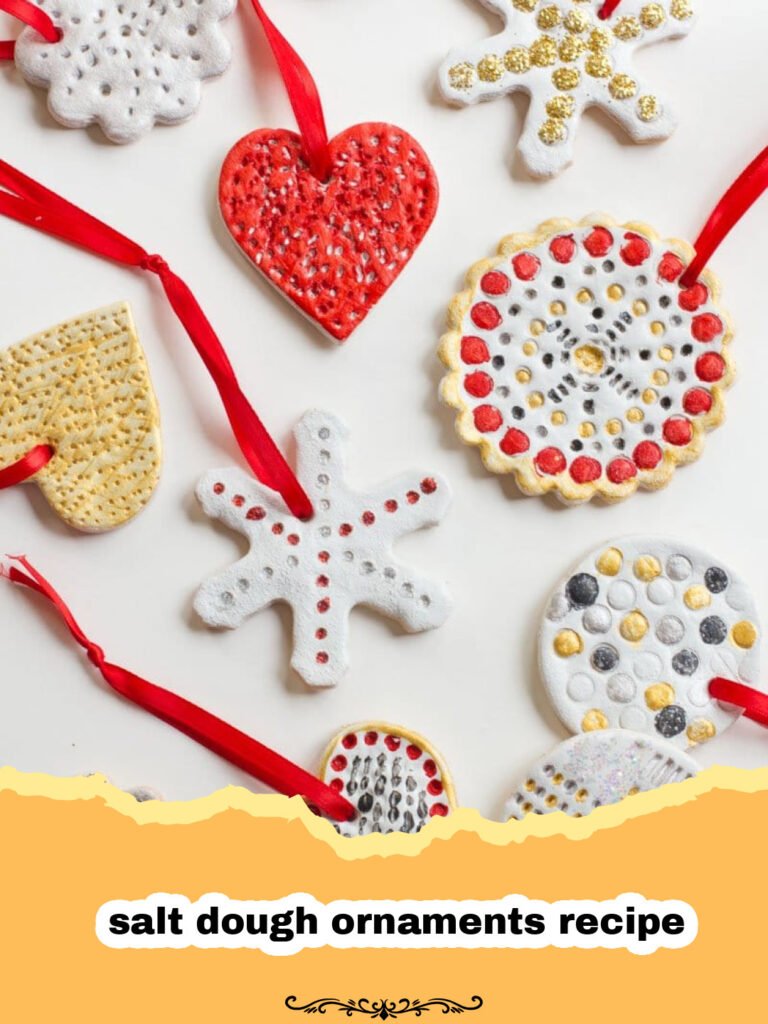
Classic Salt Dough Ornaments
Create beautiful, lasting holiday decorations or personalized gifts with this simple and fun classic salt dough ornaments recipe. Perfect for all ages, this craft uses common pantry staples to make cherished keepsakes.
- Total Time: 2-5 hours (including baking/drying)
- Yield: 12–24 ornaments (depending on size) 1x
Ingredients
2 cups all-purpose flour
1 cup fine grain salt (table salt)
1 cup warm water (approx.)
Acrylic paints, tempera paints, or permanent markers
Clear sealant (e.g., Mod Podge, acrylic spray)
Ribbon, twine, or string for hanging
Instructions
Step 1: In a large mixing bowl, combine 2 cups of all-purpose flour and 1 cup of fine grain salt. Whisk them together thoroughly until well combined.
Step 2: Gradually add 1 cup of warm water to the dry ingredients, mixing with a spoon or your hands until a shaggy ball forms.
Step 3: Turn the dough out onto a lightly floured surface and knead for 5-10 minutes until it’s smooth, elastic, and no longer sticky.
Step 4: Preheat your oven to its lowest setting (200°F / 95°C) and line several baking sheets with parchment paper.
Step 5: Roll out the salt dough on a lightly floured surface to an even thickness of about 1/4 inch (6mm).
Step 6: Use cookie cutters to cut out desired shapes and carefully place them onto the prepared baking sheets.
Step 7: Use a drinking straw or small skewer to create a hole at the top of each ornament for hanging.
Step 8: Bake the ornaments for 2-4 hours (or longer for thicker pieces), flipping periodically, until they are hard and completely dry. Avoid browning.
Step 9: Turn off the oven and allow the ornaments to cool completely inside the oven to prevent cracking.
Step 10: Once cool and dry, decorate your ornaments using paints, markers, glitter, or other embellishments.
Step 11: After decorations are dry, apply a clear, non-toxic sealant to protect the ornaments and give them a durable finish.
Step 12: Thread ribbon, twine, or string through the holes to create hangers, and your ornaments are ready to display or gift.
Notes
This recipe is for crafting purposes only and is not safe for consumption. Ensure all paints and sealants used are non-toxic, especially if crafting with children.
- Prep Time: 20 minutes
- Cook Time: 2-4 hours
- Category: Crafts
- Cuisine: N/A
Keywords: salt dough ornaments recipe, salt dough recipe, christmas crafts, diy ornaments, homemade decorations, kid-friendly craft, holiday activity, christmas ornaments