There’s something magical about winter, isn’t there? The crisp air, the quiet blanket of snow, and the cozy feeling of being indoors. But as much as I love my warm kitchen, my heart always goes out to our feathered friends fluttering outside, braving the cold. Years ago, during a particularly harsh winter, I remember looking out my window and seeing a tiny robin struggling to find food. It broke my heart! That’s when I decided I needed to do something. I stumbled upon the idea of making a bird seed ornaments recipe, and it quickly became a beloved tradition in my home. It’s a project that brings so much joy – not just to the birds, but to everyone involved in making them. My kids absolutely love pressing the seeds into cookie cutters, and I love watching the birds flock to our homemade treats. It’s a simple act of kindness that makes a big difference, and it’s surprisingly easy to do!
Why This Recipe is a Must-Try
- Support Local Wildlife: Providing a reliable food source helps birds conserve energy during cold months when natural food is scarce. This bird seed ornaments recipe is a lifesaver for them!
- Fun for All Ages: This is an ideal family activity! Kids love choosing cookie cutters and pressing the mixture, making it a wonderful way to connect with nature and each other.
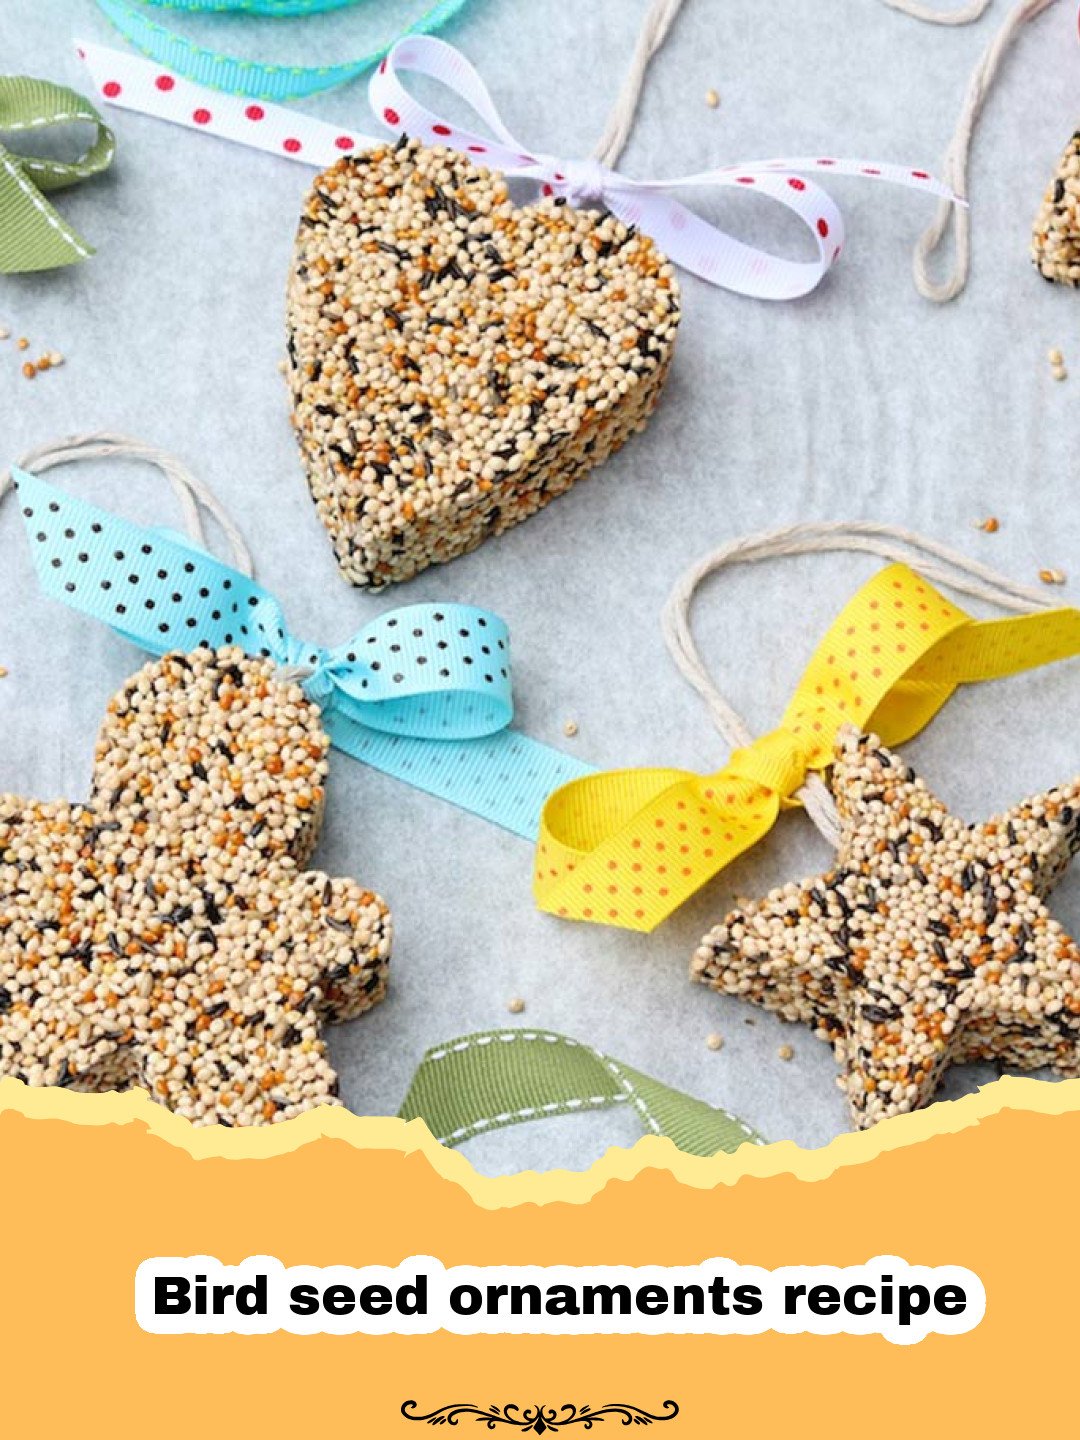
- Beautiful & Natural Decor: These aren’t just feeders; they’re charming, edible decorations that add a rustic, festive touch to your trees and shrubs, enhancing your winter garden’s beauty.
- Eco-Friendly & Sustainable: Using natural ingredients and providing nourishment aligns perfectly with a desire to live more sustainably and care for our environment.
Key Ingredient Notes
Unflavored Gelatin
Gelatin is the unsung hero of this bird seed ornaments recipe. It acts as the perfect binder, holding all those tiny seeds together without adding any harmful chemicals or flavors. You’ll find it in the baking aisle, often in small packets. Make sure to use unflavored gelatin, as flavored varieties contain sugar and artificial colors that aren’t good for birds. The key is to dissolve it completely in boiling water to create a strong, clear adhesive that will set firmly.
Mixed Bird Seed
The star of the show! A good quality mixed bird seed will attract a wider variety of birds. Look for mixes that contain black oil sunflower seeds, millet, and cracked corn, as these are favorites for many common backyard birds like chickadees, finches, and cardinals. Avoid mixes with a lot of red milo or wheat, as these are often filler seeds that many birds tend to discard. Feel free to customize your bird seed blend based on the types of birds you want to attract. Some people even add dried mealworms for insect-eating birds!
Light Corn Syrup (Optional but Recommended)
While gelatin does most of the heavy lifting, a tablespoon of light corn syrup can really enhance the binding power and give your bird seed ornaments recipe a little extra stickiness and resilience. It helps create a smoother, more pliable mixture that’s easier to press into molds and less likely to crumble once dry. The small amount used is perfectly safe for birds and doesn’t add excessive sugar.
Step-by-Step Guide with Pro Tips
Getting these beautiful bird seed ornaments right is all about precision and a bit of patience. Follow these steps, and you’ll have delightful feeders ready in no time!
Gather Your Tools and Ingredients
- Large mixing bowl
- Spoon or spatula
- Measuring cups and spoons
- Parchment paper
- Baking sheet
- Cookie cutters (metal ones work best)
- Straws or pencils (for making holes)
- Twine or natural ribbon
- 1/2 cup boiling water
- 2 packets (about 1/4 ounce each) unflavored gelatin
- 1 tablespoon light corn syrup (optional)
- 1 teaspoon all-purpose flour (optional, for extra binding)
- 2-3 cups mixed bird seed
Pro Tip: Have all your ingredients and tools laid out before you begin. This makes the process much smoother, especially if you have little helpers!
Mixing the Binder
- Step 1: In your large mixing bowl, carefully pour in 1/2 cup of boiling water. This needs to be genuinely hot to ensure the gelatin dissolves completely.
- Step 2: Sprinkle the two packets of unflavored gelatin over the hot water. Stir constantly and vigorously until the gelatin is entirely dissolved and the mixture is smooth, with no lumps remaining. This step is crucial for the binder’s strength.
- Step 3: If you’re using them, stir in the light corn syrup and the all-purpose flour into the gelatin mixture. The flour adds a bit of extra structure, and the corn syrup boosts stickiness. Continue stirring until everything is well combined and smooth.
Adding the Bird Seed
- Step 4: Gradually add the mixed bird seed to the gelatin mixture, starting with 2 cups. Stir continuously, ensuring every single seed is thoroughly coated with the sticky binder. You’re aiming for a consistency that is very sticky and holds together when squeezed, but isn’t overly wet.
- Step 5: If the mixture still seems too wet or loose, add the remaining cup of bird seed little by little, mixing after each addition, until you reach the desired sticky but cohesive consistency for your bird seed ornaments recipe.
Shaping and Setting the Ornaments
- Step 6: Line a baking sheet with parchment paper. This prevents sticking and makes cleanup a breeze. Arrange your chosen cookie cutters on the parchment-lined sheet. Metal cookie cutters tend to work best because they have sharper edges.
- Step 7: Firmly press the bird seed mixture into each cookie cutter. This is where you need to be deliberate – really compact the mixture tightly into the molds. The tighter you pack it, the less likely your bird seed ornaments are to break.
- Step 8: Using a straw or a pencil, carefully create a hole near the top of each ornament. Make sure the hole goes all the way through, but don’t place it too close to the edge, or it might break when you hang it.
- Step 9: Gently remove the cookie cutters. If the ornaments are a bit too soft to hold their shape, let them sit in the cutters for about 15-20 minutes to set slightly before carefully sliding the cutters off.
- Step 10: Allow the bird seed ornaments to dry completely. This is the longest part! They need to dry for at least 2-3 hours, or ideally, overnight, at room temperature or in a cool, dry place. Flipping them occasionally can help with even drying. You can also use a fan to speed up the process.
The Finishing Touch
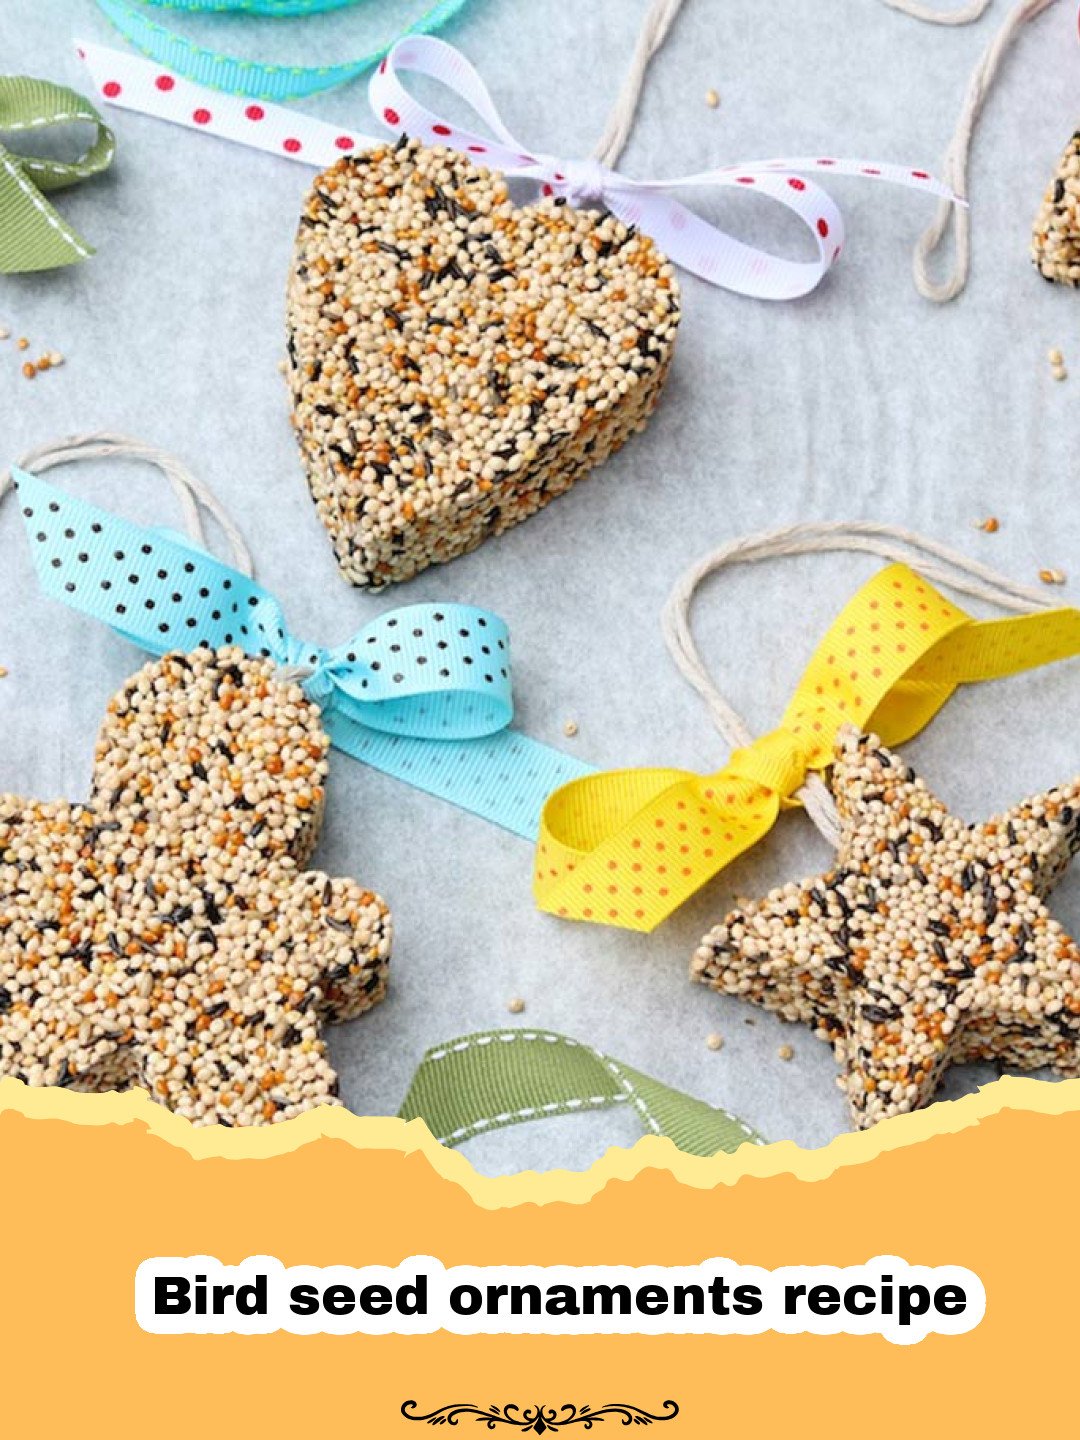
- Step 11: Once your bird seed ornaments are thoroughly dry and feel firm to the touch, thread a piece of twine or natural ribbon through the hole you created. Tie a secure knot or loop for hanging.
- Step 12: Your beautiful, homemade bird seed ornaments are now ready! Head outside and hang them on tree branches, shrubs, or even on a bird feeder stand. Step back and enjoy watching your feathered friends discover their new treats!
Variations & Serving Suggestions
Shape & Size Fun
Don’t limit yourself to just stars and hearts! Use a variety of cookie cutter shapes like bells, animals, or even letters. For larger ornaments, consider using a Bundt pan or a small cake tin, pressing the mixture into a ring. You can even create mini bird seed ornament garlands by making many small shapes and stringing them together once dry. Get creative with your bird seed ornaments recipe!
Seed Blends for Specific Birds
While a general mix is great, you can tailor your seed blend to attract specific bird species. For example, finches love thistle seed (nyjer), while cardinals and grosbeaks are big fans of black oil sunflower seeds. If you have nut-loving birds like woodpeckers or jays, add some chopped peanuts (unsalted) to your mix. This customization makes your bird seed ornaments even more appealing!
Presentation & Gifting
These homemade bird seed ornaments make fantastic gifts for nature lovers! Package a few in a nice box with a pretty ribbon. Include a tag explaining the ingredients and how to hang them. For storing any extra mixture or finished ornaments before hanging, I highly recommend using sturdy containers. I personally use and love Basics Glass Food Storage containers because they keep everything fresh and tidy. They’re also great for storing other DIY projects like my Salt Dough Ornaments Recipe or even ingredients for a festive Christmas Trail Mix!
Nutrition Information
Please note: These bird seed ornaments are specifically designed for wild birds and are not intended for human consumption. The nutritional information provided below is a theoretical estimate for the sake of schema compliance and represents the content of one typical ornament if consumed by an animal, not a human.
| Nutrient | Amount per Ornament (estimated) |
|---|---|
| Calories | 50 calories |
| Carbohydrate Content | 5g |
| Cholesterol Content | 0mg |
| Fat Content | 3g |
| Fiber Content | 2g |
| Protein Content | 2g |
| Saturated Fat Content | 0.5g |
| Serving Size | 1 ornament |
| Sodium Content | 1mg | Sugar Content | 1g |
| Trans Fat Content | 0g |
| Unsaturated Fat Content | 2.5g |
Conclusion
Making a bird seed ornaments recipe is more than just a craft; it’s an act of compassion that connects us to the natural world right outside our windows. It’s a simple, affordable, and incredibly rewarding project that brings life and color to your winter landscape. Imagine the delight of seeing a cardinal or a flock of finches enjoying the treats you’ve lovingly prepared! So, gather your supplies, call the family, and create some beautiful bird seed ornaments this season. Your feathered neighbors will thank you, and you’ll find immense satisfaction in contributing to their well-being. Happy crafting and happy bird-watching!
FAQs
How long do bird seed ornaments last?
When made correctly and kept dry, bird seed ornaments can last several weeks to a few months outdoors, depending on weather conditions and how quickly birds discover and consume them. Indoors, they can last indefinitely if kept dry and away from humidity.
What kind of bird seed should I use for these ornaments?
A general wild bird mix works best, as it contains a variety of seeds that attract many different species. Avoid mixes with too many fillers like red milo, which many common backyard birds don’t prefer. Black oil sunflower seeds, millet, and cracked corn are usually excellent choices.
Can I use peanut butter instead of gelatin to bind the bird seed?
While peanut butter can be used, gelatin creates a firmer, more durable ornament that withstands varying weather conditions better. Peanut butter can also become rancid more quickly and attract other animals like squirrels more readily. Gelatin is generally considered a safer and more effective binder for this bird seed ornaments recipe.
Are these bird seed ornaments safe for all birds?
Yes, the ingredients (unflavored gelatin, small amounts of corn syrup, and bird seed) are generally safe for wild birds. It’s crucial to ensure the ornaments are fully dry before hanging to prevent mold growth. Also, use natural twine or untreated ribbon for hanging to prevent harm if any part is ingested.
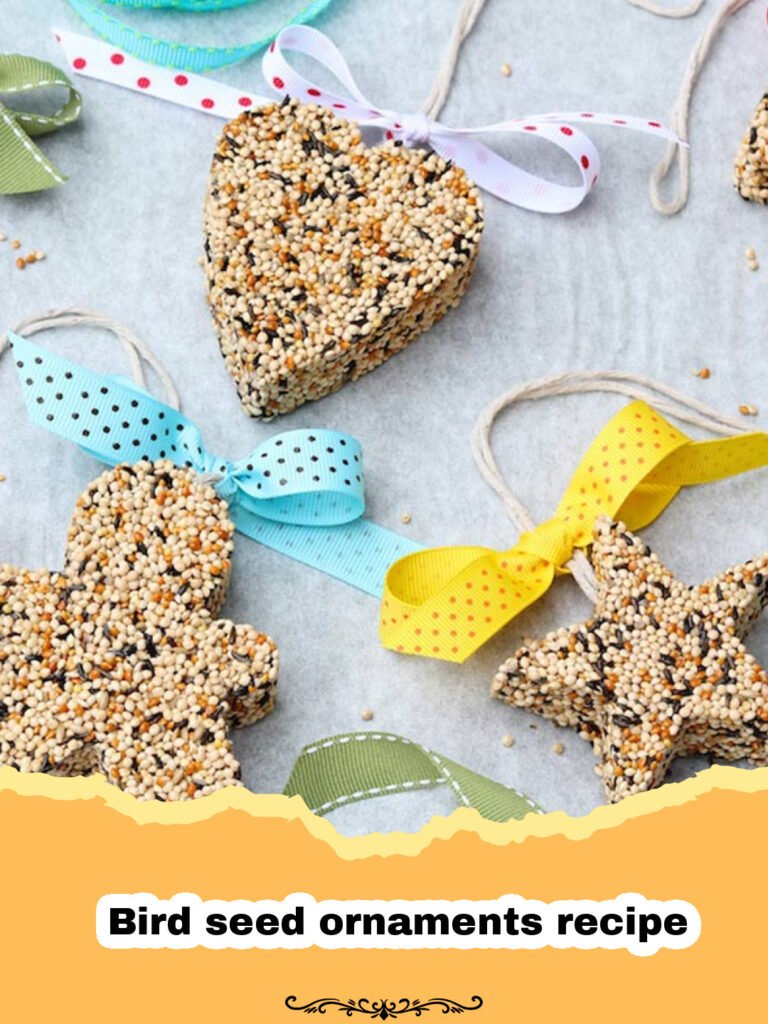
Easy DIY Bird Seed Ornaments
A simple and rewarding bird seed ornaments recipe that helps feed wild birds during the colder months while adding a touch of natural beauty to your yard. This bird seed ornaments recipe is easy to follow and great for families.
- Total Time: 2-3 hours (including setting time)
- Yield: 8–12 ornaments 1x
Ingredients
1/2 cup boiling water
2 packets (about 1/4 ounce each) unflavored gelatin
1 tablespoon light corn syrup (optional, helps with stickiness)
1 teaspoon all-purpose flour (optional, for extra binding)
2–3 cups mixed bird seed
Cookie cutters
Twine or ribbon for hanging
Straws or pencils for making holes
Parchment paper
Baking sheet
Instructions
Step 1: In a large bowl, dissolve the unflavored gelatin in 1/2 cup boiling water, stirring constantly until completely smooth. Make sure there are no lumps.
Step 2: Stir in the light corn syrup and all-purpose flour (if using) into the gelatin mixture. This creates the sticky binder for your bird seed ornaments recipe.
Step 3: Gradually add the mixed bird seed to the gelatin mixture, stirring well to ensure all the seeds are thoroughly coated. You want a consistency that’s sticky but not overly wet. If it’s too wet, add a little more bird seed.
Step 4: Place parchment paper on a baking sheet. Arrange your cookie cutters on the parchment paper. Firmly press the bird seed mixture into each cookie cutter, making sure to compact it tightly.
Step 5: Using a straw or a pencil, carefully make a hole near the top of each ornament for hanging. Ensure the hole goes all the way through but isn’t too close to the edge.
Step 6: Carefully remove the cookie cutters. If the ornaments are too soft to remove, let them set for 15-20 minutes before gently sliding the cutters off.
Step 7: Allow the bird seed ornaments to dry completely for at least 2-3 hours, or preferably overnight, at room temperature or in a cool, dry place. Flipping them once or twice can help ensure even drying.
Step 8: Once thoroughly dry and firm, thread twine or ribbon through the holes. Your homemade bird seed ornaments are ready to hang outdoors and bring joy to your feathered friends!
Notes
Store finished ornaments in an airtight container in a cool, dry place if not hanging immediately. Avoid making these on very humid days. For best results, ensure ornaments are completely dry before hanging to prevent mold.
- Prep Time: 20 minutes
- Cook Time: 0 minutes
- Category: DIY Crafts, Bird Food, Winter Projects
- Cuisine: Wildlife Friendly
Keywords: bird seed ornaments recipe, DIY bird feeders, winter bird food, homemade bird treats, garden crafts, wildlife friendly, gelatin bird feeders, easy winter craft