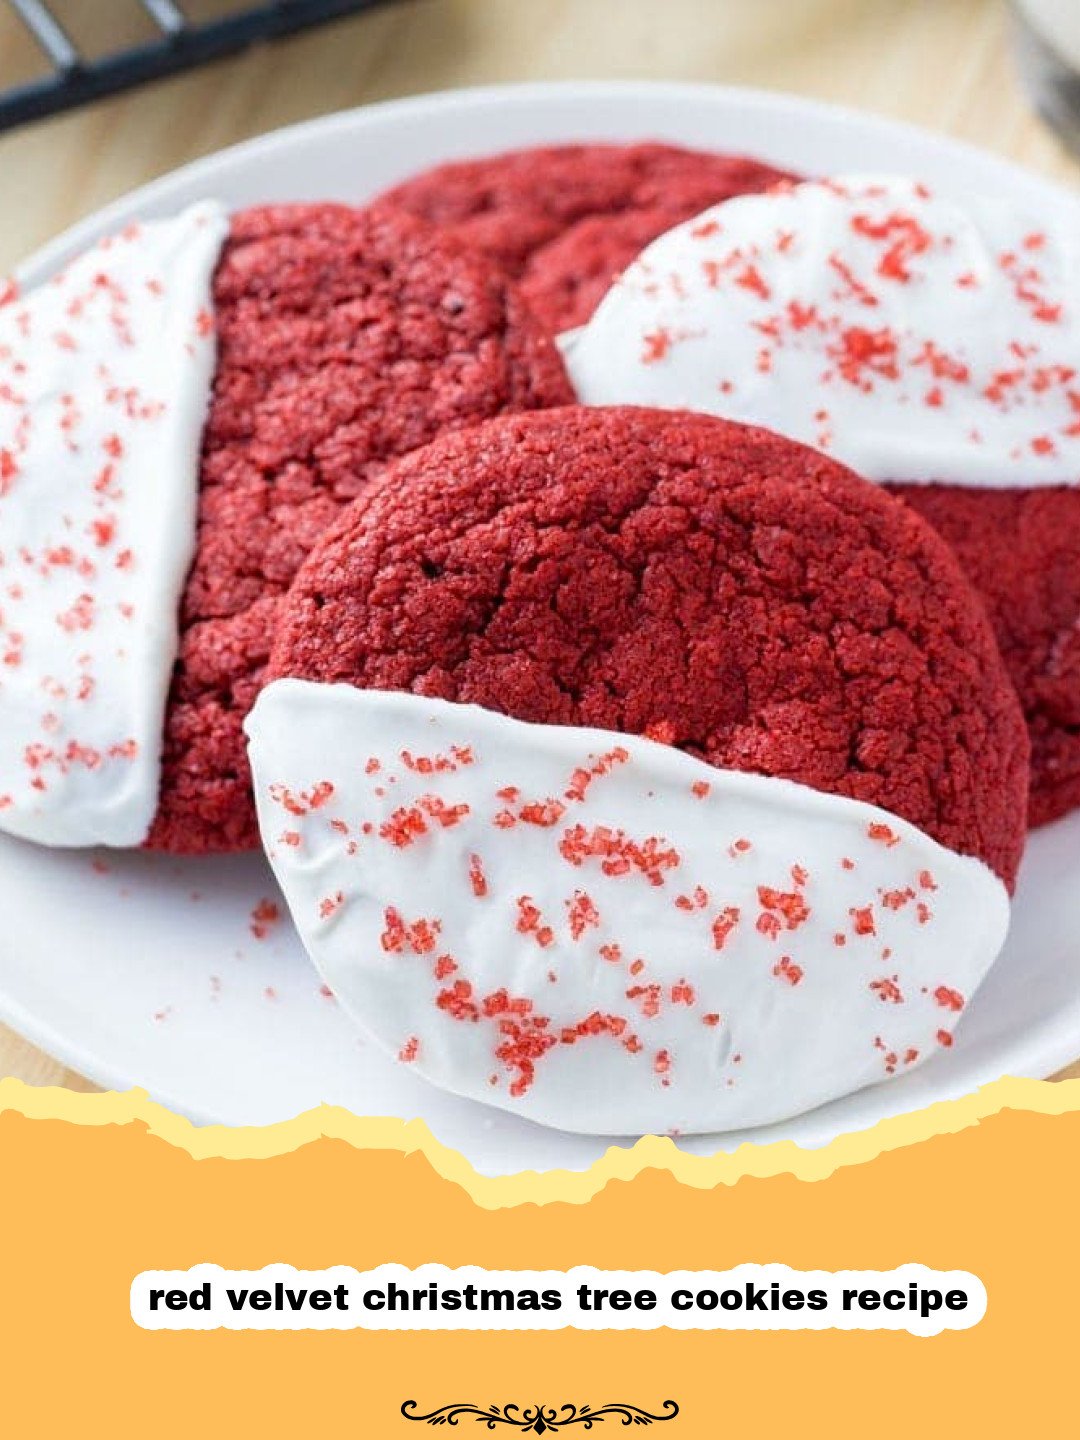
There’s something truly magical about Christmas baking, isn’t there? I still remember my grandmother’s kitchen, warm with the scent of spices and vanilla, her hands expertly rolling out dough. Every year, we’d gather around her flour-dusted table, little hands eager to help cut out festive shapes. The star of the show for me was always a vibrant, ruby-red cookie, perfectly adorned like a tiny Christmas tree. While her recipe was a closely guarded secret, passed down through generations, I’ve spent years perfecting my own version that captures that same nostalgic wonder. This year, I’m thrilled to share my ultimate red velvet christmas tree cookies recipe with you. It’s more than just a cookie; it’s a piece of holiday joy, a memory in the making, and a delicious way to bring that festive spirit into your home. These cookies are not just stunningly beautiful with their deep red hue and delicate cream cheese frosting; they’re also incredibly tender, subtly chocolatey, and utterly irresistible. Perfect for sharing, gifting, or simply enjoying by the fire, they embody everything I love about the holiday season. Get ready to create some delicious traditions!
Why This Red Velvet Christmas Tree Cookies Recipe is a Must-Try
- These cookies boast an incredibly soft and chewy texture, unlike any other Christmas cookie you’ll make.
- The classic red velvet flavor, with its subtle cocoa notes and tang, is perfectly balanced with a rich, creamy cream cheese frosting.
- Visually stunning and festive, these Christmas tree-shaped cookies with their vibrant color are sure to be a showstopper on any holiday dessert platter.
- They are surprisingly fun to make, offering a wonderful baking project for the whole family, perfect for creating cherished holiday memories.
Key Ingredient Notes
Crafting the perfect red velvet christmas tree cookies recipe starts with understanding a few key ingredients that make them truly special.
Unsweetened Cocoa Powder
Don’t skip or skimp on the cocoa powder! While red velvet isn’t meant to be intensely chocolatey, a good quality unsweetened cocoa powder provides that essential subtle chocolate background and helps deepen the red color. Dutch-processed cocoa powder is often preferred for red velvet as it is less acidic, resulting in a darker, richer flavor and color, but natural cocoa works too. It reacts with the baking soda and vinegar to create the signature red hue.
Buttermilk
Buttermilk is a cornerstone of red velvet for a reason. Its acidity not only tenderizes the cookies, giving them a wonderfully soft crumb, but it also reacts with the baking soda to create lift and that classic red velvet tang. If you don’t have buttermilk on hand, you can easily make a substitute: simply add one tablespoon of white vinegar or lemon juice to a measuring cup, then fill the rest with regular milk until it reaches one cup. Let it sit for 5-10 minutes until it slightly curdles before using.
Red Food Coloring
To achieve that iconic, vibrant red color for your red velvet christmas tree cookies recipe, gel food coloring is your best friend. Liquid food coloring can thin out your dough and require a lot more product to get the desired intensity. Gel food coloring is concentrated, so a little goes a long way. Start with a generous amount, as the color will often lighten slightly during baking. I usually opt for a ‘super red’ or ‘no-taste red’ variety to ensure a deep, festive hue without any metallic aftertaste.
Step-by-Step Guide with Pro Tips
Let’s get baking! This red velvet christmas tree cookies recipe is straightforward, but these pro tips will ensure your cookies are absolutely perfect.
Making the Dough
Making the dough for your red velvet christmas tree cookies recipe is the first exciting step.
- Step 1: In a large bowl, whisk together the all-purpose flour, unsweetened cocoa powder, baking soda, and salt. Set aside.
- Step 2: In the bowl of a stand mixer fitted with the paddle attachment, cream together the softened unsalted butter and granulated sugar on medium-high speed until light and fluffy, about 2-3 minutes.
- Step 3: Beat in the large egg and vanilla extract until well combined, scraping down the sides of the bowl as needed.
- Step 4: Add the red gel food coloring and mix until the color is evenly distributed throughout the butter mixture. Be generous here to achieve a vibrant red!
- Step 5: With the mixer on low speed, gradually add half of the dry ingredients to the wet ingredients, mixing until just combined.
- Step 6: Pour in the buttermilk and mix until just incorporated.
- Step 7: Add the remaining dry ingredients and mix on low speed until a soft dough forms. Be careful not to overmix!
- Step 8: Divide the dough in half, flatten each half into a disc, wrap tightly in plastic wrap, and refrigerate for at least 1 hour (or up to 2 days). This chilling step is crucial for easy handling and preventing the cookies from spreading too much.
Rolling and Cutting the Cookies
Patience here makes perfect Christmas trees for your red velvet christmas tree cookies recipe.
- Step 9: Preheat your oven to 375°F (190°C). Line baking sheets with parchment paper or silicone baking mats.
- Step 10: On a lightly floured surface, roll out one disc of chilled dough to about 1/4-inch thickness. If the dough is too stiff, let it sit at room temperature for 5-10 minutes.
- Step 11: Use a Christmas tree-shaped cookie cutter to cut out cookies. Carefully transfer the cutouts to the prepared baking sheets, leaving about 1 inch between them. Gather any scraps, gently re-roll, and cut out more cookies until all dough is used.
- Step 12: Bake for 8-10 minutes, or until the edges are set and lightly golden. Do not overbake, as this will make them dry. The key to a soft red velvet christmas tree cookies recipe is not to overbake!
- Step 13: Let the cookies cool on the baking sheets for 5 minutes before transferring them to a wire rack to cool completely. Repeat with the second dough disc.
Making the Cream Cheese Frosting
This classic frosting is the perfect complement to your red velvet christmas tree cookies recipe.
- Step 14: In a medium bowl, beat the softened cream cheese and unsalted butter together on medium speed until smooth and creamy, about 2 minutes.
- Step 15: Gradually add the powdered sugar, one cup at a time, mixing on low speed until incorporated, then increasing to medium-high speed until light and fluffy.
- Step 16: Beat in the vanilla extract until just combined. If the frosting is too thick, add a tiny splash of milk or cream. If it’s too thin, add a bit more powdered sugar.
Decorating Your Red Velvet Christmas Tree Cookies
Now for the fun part – bringing your trees to life!
- Step 17: Once the cookies are completely cool, spread or pipe the cream cheese frosting onto each cookie. For a professional look, you can use a piping bag with a star tip.
- Step 18: Decorate with festive sprinkles, edible glitter, or small candies to resemble Christmas ornaments. This makes the red velvet christmas tree cookies recipe truly shine!
- Step 19: Allow the frosting to set slightly before serving or storing. Store frosted cookies in an airtight container in the refrigerator. For longer storage, consider using Basics Glass Food Storage containers.
Variations & Serving Suggestions
This red velvet christmas tree cookies recipe is fantastic as is, but here are some ideas to make it even more special:
- Citrus Zest: Add a teaspoon of orange or lemon zest to the cookie dough for a brighter, more aromatic flavor profile.
- Chocolate Drizzle: Instead of, or in addition to, sprinkles, drizzle melted white chocolate or dark chocolate over the frosted cookies for an extra layer of decadence.
- Mini Trees: Use smaller cookie cutters for bite-sized treats, perfect for a cookie exchange or a large holiday gathering. Adjust baking time slightly for smaller cookies.
- Gingerbread Twist: Incorporate a pinch of ground ginger and cinnamon into the dough for a subtle spiced twist, adding another layer to the red velvet experience.
- Serving Suggestions: These cookies are perfect alongside a cup of hot cocoa, a glass of cold milk, or as part of a festive dessert spread. They also make wonderful edible gifts when packaged in decorative boxes. Pair them with other holiday favorites like an Elegant Cranberry Pecan Chicken Salad Puff Pastry Stars for a complete holiday party menu, or present them next to a Whimsical & Wonderful Holiday Elf Charcuterie Board for an unforgettable spread.
Nutrition Information
Here’s a breakdown of the estimated nutrition for one serving of our red velvet christmas tree cookies recipe.
| Nutrient | Amount Per Serving |
|---|---|
| Calories | 280 kcal |
| Carbohydrate Content | 38g |
| Cholesterol Content | 55mg |
| Fat Content | 14g |
| Fiber Content | 1g |
| Protein Content | 3g |
| Saturated Fat Content | 8g |
| Serving Size | 1 cookie |
| Sodium Content | 150mg |
| Sugar Content | 25g |
| Trans Fat Content | 0.5g |
| Unsaturated Fat Content | 5g |
Conclusion
There you have it – my cherished red velvet christmas tree cookies recipe, ready to bring cheer and deliciousness to your holiday season. These cookies are more than just a sweet treat; they’re an invitation to slow down, enjoy the process of baking, and create lasting memories with loved ones. Whether you’re making them for a festive gathering, a thoughtful gift, or a quiet moment with a cup of tea, I hope they fill your home with warmth and joy. Happy baking, and happy holidays!
FAQs
What gives red velvet cookies their distinctive color and flavor?
The vibrant red color in red velvet cookies typically comes from red food coloring, often gel-based for intensity. The distinctive flavor is a combination of subtle cocoa powder, a slight tang from buttermilk and sometimes vinegar, which reacts with baking soda to create a tender crumb and a hint of a unique flavor profile.
Can I make these red velvet christmas tree cookies recipe ahead of time?
Absolutely! The cookie dough can be made up to 2 days in advance and stored in the refrigerator. You can also bake the cookies ahead of time and freeze them unfrosted for up to 3 months. Thaw them at room temperature before frosting. The frosted cookies can be stored in an airtight container in the refrigerator for 3-4 days.
What’s the best way to get perfectly shaped Christmas tree cookies?
To get perfectly shaped red velvet Christmas tree cookies, ensure your dough is well-chilled for at least an hour before rolling. This prevents it from spreading too much in the oven. Also, use a good quality metal cookie cutter and lightly flour your work surface and the cutter. Don’t overwork the dough when re-rolling scraps to maintain a tender texture.
Can I substitute ingredients in this red velvet christmas tree cookies recipe?
For buttermilk, you can make a substitute by adding 1 tablespoon of white vinegar or lemon juice to a measuring cup and filling the rest with regular milk, letting it sit for 5-10 minutes. While other substitutions might be possible, they could alter the classic red velvet texture and flavor. For best results, stick to the recipe, especially for the cocoa powder and gel food coloring.
Red Velvet Christmas Tree Cookies
A delightful and festive red velvet cookie recipe shaped like Christmas trees, complete with a creamy cream cheese frosting. Perfect for holiday baking and sharing.
- Total Time: 2 hours 30 minutes (includes chilling)
- Yield: 24 cookies 1x
Ingredients
2 1/2 cups all-purpose flour
2 tablespoons unsweetened cocoa powder
1 teaspoon baking soda
1/2 teaspoon salt
1 cup (2 sticks) unsalted butter, softened
1 3/4 cups granulated sugar
1 large egg
1 teaspoon vanilla extract
1–2 tablespoons red gel food coloring (super red or no-taste red)
1/2 cup buttermilk
FOR THE CREAM CHEESE FROSTING:
8 oz cream cheese, softened
1/2 cup (1 stick) unsalted butter, softened
4 cups powdered sugar
1 teaspoon vanilla extract
Optional: festive sprinkles for decoration
Instructions
Step 1: In a large bowl, whisk together the all-purpose flour, unsweetened cocoa powder, baking soda, and salt. Set aside.
Step 2: In the bowl of a stand mixer fitted with the paddle attachment, cream together the softened unsalted butter and granulated sugar on medium-high speed until light and fluffy, about 2-3 minutes.
Step 3: Beat in the large egg and vanilla extract until well combined, scraping down the sides of the bowl as needed.
Step 4: Add the red gel food coloring and mix until the color is evenly distributed throughout the butter mixture. Be generous here to achieve a vibrant red!
Step 5: With the mixer on low speed, gradually add half of the dry ingredients to the wet ingredients, mixing until just combined.
Step 6: Pour in the buttermilk and mix until just incorporated.
Step 7: Add the remaining dry ingredients and mix on low speed until a soft dough forms. Be careful not to overmix!
Step 8: Divide the dough in half, flatten each half into a disc, wrap tightly in plastic wrap, and refrigerate for at least 1 hour (or up to 2 days). This chilling step is crucial for easy handling and preventing the cookies from spreading too much.
Step 9: Preheat your oven to 375°F (190°C). Line baking sheets with parchment paper or silicone baking mats.
Step 10: On a lightly floured surface, roll out one disc of chilled dough to about 1/4-inch thickness. If the dough is too stiff, let it sit at room temperature for 5-10 minutes.
Step 11: Use a Christmas tree-shaped cookie cutter to cut out cookies. Carefully transfer the cutouts to the prepared baking sheets, leaving about 1 inch between them. Gather any scraps, gently re-roll, and cut out more cookies until all dough is used.
Step 12: Bake for 8-10 minutes, or until the edges are set and lightly golden. Do not overbake, as this will make them dry.
Step 13: Let the cookies cool on the baking sheets for 5 minutes before transferring them to a wire rack to cool completely. Repeat with the second dough disc.
Step 14: In a medium bowl, beat the softened cream cheese and unsalted butter together on medium speed until smooth and creamy, about 2 minutes.
Step 15: Gradually add the powdered sugar, one cup at a time, mixing on low speed until incorporated, then increasing to medium-high speed until light and fluffy.
Step 16: Beat in the vanilla extract until just combined. If the frosting is too thick, add a tiny splash of milk or cream. If it’s too thin, add a bit more powdered sugar.
Step 17: Once the cookies are completely cool, spread or pipe the cream cheese frosting onto each cookie. For a professional look, you can use a piping bag with a star tip.
Step 18: Decorate with festive sprinkles, edible glitter, or small candies to resemble Christmas ornaments.
Step 19: Allow the frosting to set slightly before serving or storing. Store frosted cookies in an airtight container in the refrigerator.
Notes
Chilling the dough is essential for preventing spread and ensuring well-defined cookie shapes. For the best color, use gel food coloring. Store frosted cookies in an airtight container in the refrigerator.
- Prep Time: 45 minutes
- Cook Time: 10 minutes
- Category: Dessert
- Cuisine: American
Nutrition
- Serving Size: 1 cookie
- Calories: 280 kcal
- Sugar: 25g
- Sodium: 150mg
- Fat: 14g
- Saturated Fat: 8g
- Unsaturated Fat: 5g
- Trans Fat: 0.5g
- Carbohydrates: 38g
- Fiber: 1g
- Protein: 3g
- Cholesterol: 55mg
Keywords: red velvet cookies, christmas tree cookies, holiday cookies, christmas baking, cream cheese frosting, festive desserts, cookie recipe, easy christmas cookies